How to start saving money
Lorem ipsum dolor sit amet, consectetur adipiscing elit lobortis arcu enim urna adipiscing praesent velit viverra sit semper lorem eu cursus vel hendrerit elementum morbi curabitur etiam nibh justo, lorem aliquet donec sed sit mi dignissim at ante massa mattis.
- Neque sodales ut etiam sit amet nisl purus non tellus orci ac auctor
- Adipiscing elit ut aliquam purus sit amet viverra suspendisse potent
- Mauris commodo quis imperdiet massa tincidunt nunc pulvinar
- Excepteur sint occaecat cupidatat non proident sunt in culpa qui officia
Why it is important to start saving
Vitae congue eu consequat ac felis placerat vestibulum lectus mauris ultrices cursus sit amet dictum sit amet justo donec enim diam porttitor lacus luctus accumsan tortor posuere praesent tristique magna sit amet purus gravida quis blandit turpis.

How much money should I save?
At risus viverra adipiscing at in tellus integer feugiat nisl pretium fusce id velit ut tortor sagittis orci a scelerisque purus semper eget at lectus urna duis convallis. porta nibh venenatis cras sed felis eget neque laoreet suspendisse interdum consectetur libero id faucibus nisl donec pretium vulputate sapien nec sagittis aliquam nunc lobortis mattis aliquam faucibus purus in.
- Neque sodales ut etiam sit amet nisl purus non tellus orci ac auctor
- Adipiscing elit ut aliquam purus sit amet viverra suspendisse potenti
- Mauris commodo quis imperdiet massa tincidunt nunc pulvinar
- Adipiscing elit ut aliquam purus sit amet viverra suspendisse potenti
What percentege of my income should go to savings?
Nisi quis eleifend quam adipiscing vitae aliquet bibendum enim facilisis gravida neque. Velit euismod in pellentesque massa placerat volutpat lacus laoreet non curabitur gravida odio aenean sed adipiscing diam donec adipiscing tristique risus. amet est placerat in egestas erat imperdiet sed euismod nisi.
“Nisi quis eleifend quam adipiscing vitae aliquet bibendum enim facilisis gravida neque velit euismod in pellentesque”
Do you have any comments? Share them with us on social media
Eget lorem dolor sed viverra ipsum nunc aliquet bibendum felis donec et odio pellentesque diam volutpat commodo sed egestas aliquam sem fringilla ut morbi tincidunt augue interdum velit euismod eu tincidunt tortor aliquam nulla facilisi aenean sed adipiscing diam donec adipiscing ut lectus arcu bibendum at varius vel pharetra nibh venenatis cras sed felis eget.
For most outdoor vehicle and equipment installs, a covert but sky-facing mount inside an IP67+ enclosure, either hardwired or set in a sealed magnetic case, delivers the best balance of signal reliability and water protection. Hardwiring suits any vehicle that needs continuous power and tamper resistance. A magnetic sealed case works well for temporary installs, seasonal equipment, or for situations where drilling isn’t an option.
The three approaches worth knowing:
- Hardwire installation into a constant or ignition-switched circuit, hidden behind trim but within sky view.
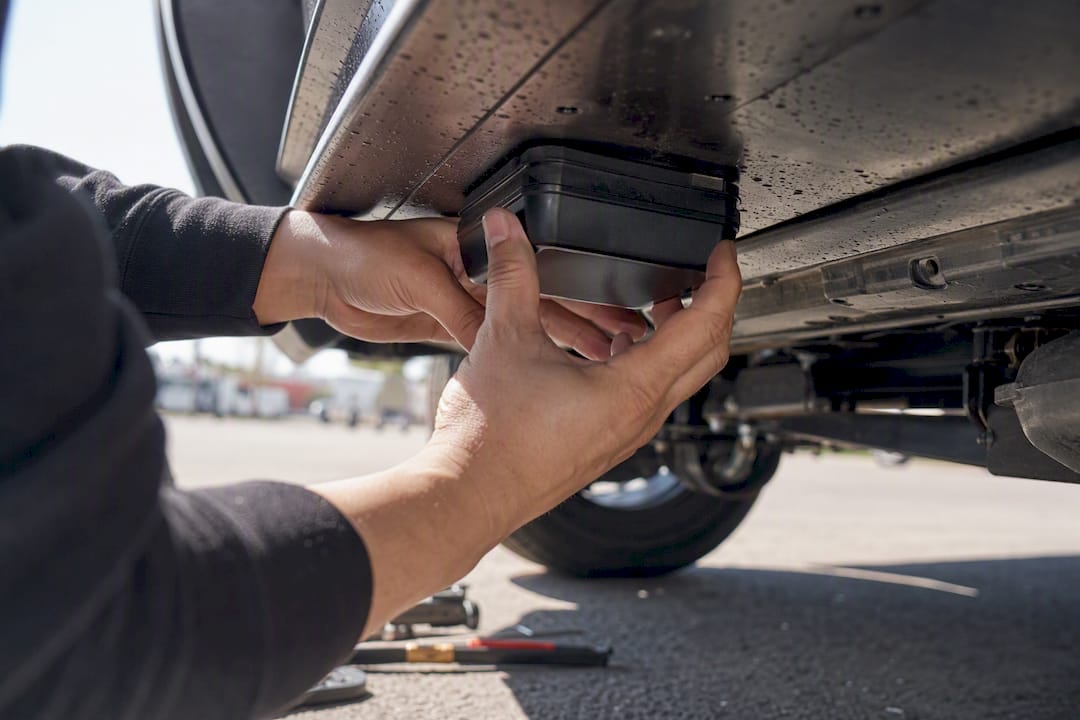
- Magnetic sealed case, mounted to a clean steel surface under a wheel well or frame rail.
- Adhesive or screw-mounted enclosure, bolted or bonded to plastic housings, light assemblies, or equipment frames.
Two things wreck more installs than bad luck ever does: metal blocking the antenna’s view of the sky, and high-pressure washdowns that force water past seals rated for splash, not blast. Before you commit to any permanent fastener, check that the unit gets a satellite fix in its final resting spot.
Table of Contents
- Waterproof GPS Tracker Mounting Locations That Actually Work
- Which GPS Tracker Mounting Method Should You Use?
- What Do IP67 and IP68 Actually Mean for Your Mount?
- How Do You Hardwire a GPS Tracker Safely?
- How Do You Verify the Install Actually Works?
- What Makes an Installer Trust a Mounting Job?
- An Honest Take on What Actually Matters Here
- Get a Mount That Matches This Guide’s Standards
- Sources
Waterproof GPS Tracker Mounting Locations That Actually Work
Location decides more of your outcome than the mount itself. A $40 case in the wrong spot underperforms a $10 bracket in the right one, because GPS reception depends on an open path to the sky, not on how expensive the housing is.
Best spots on cars and trucks
- Behind the front or rear bumper fascia, where plastic (not the steel bumper beam) sits above the unit. Plastic passes GPS signal; steel does not.
- Inside wheel wells, tucked above the liner, away from direct road spray but still glass or plastic-topped.
- Under the dashboard near the windshield, for hardwired installs where the glass gives a clean signal path and the harness is close to the fuse box.
- Inside tail light or fog light housings on vehicles with enough clearance, since the lens is nonmetallic and the compartment stays relatively dry.
- Along the rear cargo area headliner on vans and SUVs, hidden from a quick glance but with a clear shot through the roof.
Best spots on trailers and equipment
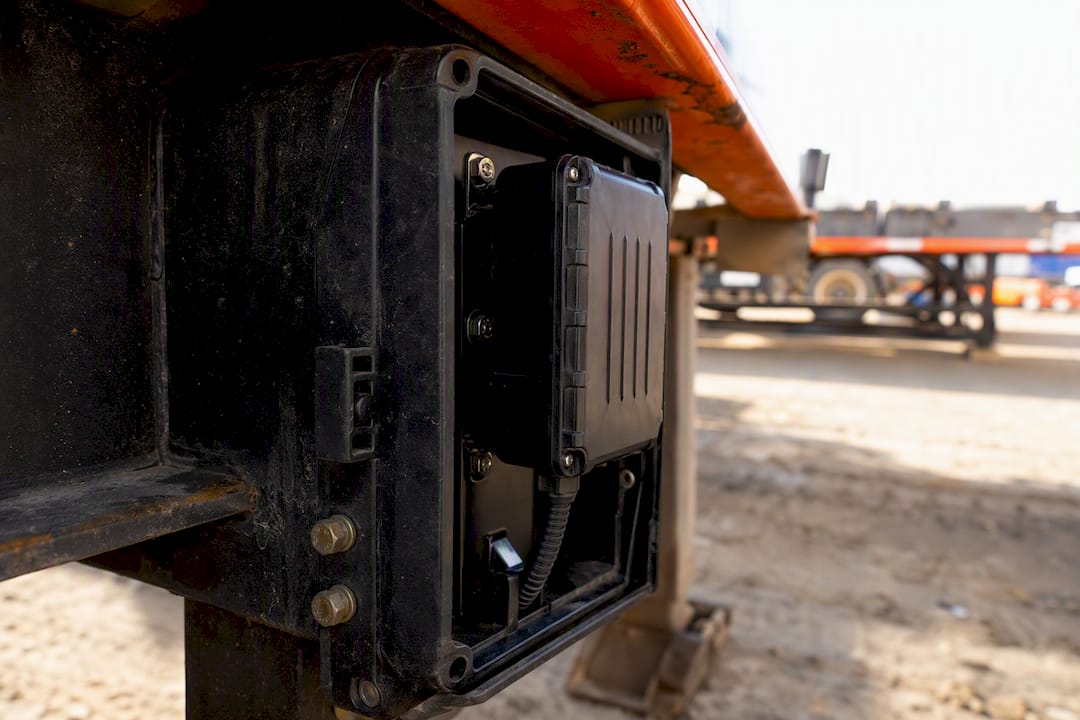
Trailers and heavy equipment take a different kind of abuse. Vibration loosens fasteners faster than corrosion breaks seals, so the mounting surface matters as much as the location. Sealed light housings, high chassis frames, and internal plastic panel cavities survive vibration, dust, and moisture while staying hidden, which is exactly the combination you want on a flatbed trailer or a skid steer that lives outdoors year-round. Toolboxes welded to trailer frames also work, provided the box lid isn’t solid steel directly over the tracker.
How to evaluate a candidate spot before you commit
Don’t guess. Set the tracker in the candidate spot, power it on, and give it several minutes to acquire satellites. Check the companion app for a live fix and note how long it took. Then inspect the spot with a flashlight for signs of standing water, mud buildup, or rust, since a dry test fit today doesn’t guarantee a dry spot after the next rainstorm. Finally, confirm you (or a technician) can reach the unit again in six months without pulling half the bumper apart. Maintenance access matters as much as the initial fit.
Pro Tip: Test signal with the vehicle parked outdoors, not in a garage. Concrete and steel structures overhead skew your results and make a bad spot look better than it is.
Metal is the recurring villain in every one of these locations. Metal attenuates GPS signals significantly, and mounting a tracker under or against thick steel degrades time-to-first-fix even when the enclosure itself is bone dry. Installers report that the most common mistake isn’t a bad enclosure or a bad adhesive. It’s sacrificing signal quality for extreme concealment, tucking a unit so deep into a steel cavity that thieves would never find it, but neither would a satellite.
Which GPS Tracker Mounting Method Should You Use?
Four methods cover almost every install you’ll encounter: magnetic cases, industrial adhesive, sealed screw mounts, and internal hardwiring. Each trades off differently between permanence, tamper resistance, and how much drilling or wiring you’re willing to do.
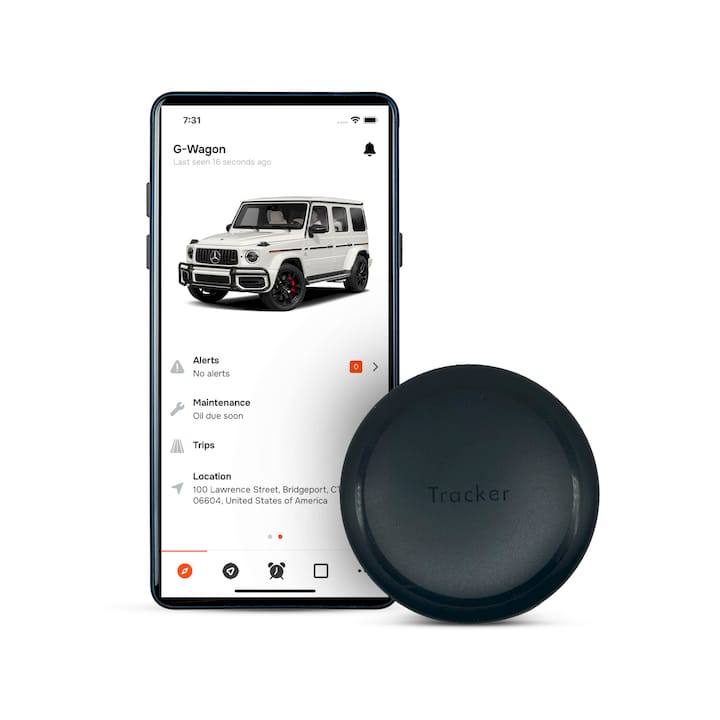
Magnetic waterproof cases. These pair a sealed tracker housing with strong internal magnets, usually rated to hold on a vertical steel surface even at highway speed. The market leans heavily toward dual neodymium magnet designs for under-vehicle mounting, and for good reason: no drilling, no wiring, and a five-minute install. Clean the mounting surface with isopropyl alcohol first, since road grime and old wax reduce magnetic grip. The tradeoff is obvious once you think about it: anything that goes on with a magnet comes off with a firm tug, so this method fits temporary tracking, rental returns, or loaner vehicles better than a permanent fleet asset.
Industrial adhesive mounts. Automotive-grade VHB (very high bond) tape or a two-part epoxy gives you a semi-permanent bond without drilling into a body panel. Surface prep matters more here than with any other method. Degrease thoroughly, scuff glossy plastic with fine sandpaper, and give the adhesive its full cure time (often 24 hours) before the vehicle sees a car wash or a rough road. Under constant vibration, cheaper adhesive tape peels at the edges within months. VHB tape holds up considerably longer, but even that has a service life and should be inspected at the same interval as your seals.
Sealed screw or bolt mounts. For anything living on a trailer frame, equipment chassis, or a truck bed liner, a bracket with a gasketed base and stainless fasteners outperforms adhesive on pure mechanical strength. Back every bolt with a washer to spread clamping load, and use threadlocker on fasteners exposed to constant vibration. The gasket between bracket and surface is doing real waterproofing work here, not just the tracker’s own housing, so don’t skip it to save five minutes.
Internal hardwire installations. Wiring a tracker into the vehicle’s constant or ignition-switched power gives you the most reliable setup of the four: no battery to recharge, no magnet to lose grip, and a housing that lives somewhere a thief can’t casually spot and yank. This is the method Motowatchdog recommends for any fleet vehicle, work truck, or asset that needs continuous, tamper-resistant tracking rather than periodic check-ins.
Here’s how the four stack up on the tradeoffs that actually matter for an outdoor install:
| Method | Permanence | Tamper resistance | Signal reliability |
|---|---|---|---|
| Magnetic case | Low, removable in seconds | Low | High, if surface allows sky view |
| Adhesive mount | Medium, degrades with age | Medium | High, placement dependent |
| Screw/bolt mount | High | Medium to high | High, placement dependent |
| Hardwire install | High | High | Highest, fixed optimal placement |
A telematics device installed with attention to grounding and antenna exposure, then verified before the final fasteners go in, avoids the two failure modes that generate most support calls: blocked antennas and skipped post-install testing.
What Do IP67 and IP68 Actually Mean for Your Mount?
An IP rating tells you exactly what an enclosure resists, and reading it correctly saves you from a costly failure six months into an install. IP67 means dust-tight and able to withstand temporary immersion up to 1 meter of water for 30 minutes, which covers rain, road spray, and the occasional puddle. IP68 goes further, rating for continuous or deeper submersion, useful for marine equipment or trackers mounted low on off-road vehicles that ford water regularly.
| IP code | Dust protection | Water protection | Good fit for |
|---|---|---|---|
| — | Dust-protected | Low-pressure water jets from any direction | Covered locations, light rain exposure |
| IP67 | Dust-tight | Temporary immersion to 1 meter, 30 minutes | Wheel wells, bumpers, exposed trailer mounts |
| IP68 | Dust-tight | Continuous submersion beyond 1 meter (manufacturer-specified depth) | Marine equipment, low off-road mounts, flood-prone areas |
Choose IP67 as the floor for anything mounted outside the cabin. IP68 earns its premium when the tracker sits low enough to sit in standing water, near a boat trailer’s axle, for instance, or on equipment that gets pressure-washed as part of routine cleaning.
The rating alone doesn’t guarantee a dry tracker for its whole service life. Even high-IP-rated devices fail when mounted where they collect road salt, debris, or repeated high-pressure washdowns, because gaskets degrade with vibration and chemical exposure long before the housing itself cracks. Build a short sealing checklist into every install:
- Inspect the main housing gasket for compression set or cracking before final mounting.
- Apply marine-grade silicone sealant around any cable entry point, even on a factory-sealed connector.
- Use a proper cable gland rather than a hole drilled through the housing wall and caulked shut.
- Check O-rings on any screw-access panel; a nicked O-ring is the single most common cause of slow water intrusion.
- Set an inspection cadence: every 90 days for vehicles that see regular washdowns or salted roads, twice a year for milder climates.
Pro Tip: If the vehicle or equipment gets pressure-washed regularly, treat that as marine-grade exposure. Swap standard cable glands for double-sealed marine versions and expect to replace gaskets more often than the manufacturer’s default schedule suggests.
How Do You Hardwire a GPS Tracker Safely?
Hardwiring rewards patience and punishes shortcuts, but the process itself is straightforward once you have the right tools on hand. Gather a multimeter, a set of fuse taps sized to your fuse box, crimp connectors, heat-shrink tubing, a wire crimping tool, and zip ties before you start. Skipping the multimeter is the single most common reason DIY installs fail: hardwired installs require tools like a multimeter, crimp connectors, and fuse taps, and without one you’re guessing at which circuit is actually constant power.
- Identify the right circuit. Use the multimeter with the key off, then again with the key on, to find a wire that stays powered continuously (for tamper detection and sleep-mode reporting) versus one that’s ignition-switched (for trip logging). Most installs tap the constant circuit and let the tracker’s internal logic handle idle detection.
- Add fuse protection. Never wire directly into a hot lead without a fuse tap. A tap rated slightly below the tracker’s max draw protects both the device and the vehicle’s wiring harness if something shorts.
- Ground the unit properly. Scrape paint down to bare metal at the ground point, attach a ring terminal, and secure it with a self-tapping screw or existing bolt. A poor ground causes intermittent power loss that looks exactly like a signal problem but isn’t.
- Route and secure the wiring. Follow existing OEM harnesses wherever possible, and secure the wire every 15 to 20 centimeters with zip ties to prevent chafing against moving parts or hot exhaust components.
- Verify before closing panels. Power the tracker, confirm it reports in the app, and only then reassemble trim panels.
A professional installer typically completes this entire sequence in 20 to 40 minutes, including the time spent finding the right circuit. If you’re not comfortable with a multimeter or you’re working on a vehicle with a sensitive electrical system (hybrids, newer trucks with body control modules), hiring a professional for that half hour saves you a blown fuse or a drained battery. Temperature swings matter here too: wiring routed near an engine bay expands and contracts across seasons, so leave a little slack in the harness rather than pulling it drum tight.
How Do You Verify the Install Actually Works?
An install isn’t finished until you’ve confirmed three things: the tracker gets a signal, the mount survives water and vibration, and the data reaching the app matches reality.
Start with a live tracking check. Open the companion app and confirm the device reports its position, noting how long the first fix took. A clean install typically acquires a fix within a few minutes outdoors; a much longer wait suggests a signal-blocked location worth reconsidering now, before you’ve committed to permanent fasteners.
Next, run a short drive test. Take a 10 to 15 minute drive through your normal route and check the app every few minutes.
- Watch for stop-start tracking, where the position freezes and jumps, since that pattern usually means partial signal blockage from metal.
- Confirm the reported route matches the roads you actually drove, not a smoothed or delayed approximation.
- Check that the app logs the trip’s start and stop correctly if you’re using mileage or trip reporting features.
Once the drive test passes, test the physical mount. A controlled splash test, a bucket of water poured over the housing rather than a direct pressure-washer blast, confirms the seals hold under realistic conditions without risking a premature failure from over-testing. Then give the mount a firm shake or a short rough-road drive to confirm nothing rattles loose.
Pro Tip: If tracking drops out consistently at the same location on your regular route, like a parking garage or a specific stretch of road, that’s a signal issue, not a mounting failure. Don’t reseal a mount that’s already dry; relocate it instead.
If something fails, the fix is usually one of three things: relocate away from metal, reseal a compromised gasket, or re-ground a wiring connection that’s gone intermittent. Rarely does a failed test mean the tracker itself is defective.
What Makes an Installer Trust a Mounting Job?
Reliable mounting advice comes from watching installs fail and fixing the pattern, not from a single lucky setup. The recommendations in this guide, sky-facing placement, IP67+ enclosures, verified signal before final fasteners, reflect what professional telematics installers consistently report as the difference between a tracker that works for years and one that generates support calls within weeks.
Motowatchdog builds its subscription-free GPS tracking hardware around exactly these installer-grade realities: long battery life for units that go months between charges, customizable geofencing alerts, and detailed mileage tracking that depends entirely on a signal that doesn’t drop out. Over 1,000 businesses currently rely on Moto Watchdog’s tracking accuracy for fleet vehicles, trailers, and equipment, which means the mounting guidance here has been stress-tested across a wide range of vehicle types and outdoor conditions, not just a single test vehicle in a controlled lot.
Consider a typical fleet scenario: a contractor hardwires a tracker into a work truck’s constant circuit, mounting it behind the front bumper fascia where PVC plastic, not the steel bumper beam, sits above the unit. The installer verifies signal before final assembly, confirms a fix within minutes, and closes the panel.
Months later, the truck gets towed from a job site overnight. The tow alert fires immediately, the live location updates without a single gap in tracking, and the vehicle is recovered before the shift even starts the next morning.
That outcome isn’t luck. It’s the direct result of choosing a nonmetallic sky path and testing the fix before committing to permanent fasteners, exactly the sequence this guide walks through. Features like tow alerts only deliver value when the underlying mount and signal path are solid enough to report reliably.
The single most reliable mounting approach pairs a sky-facing, nonmetallic placement with an IP67+ or IP68 enclosure and a verified signal test before final assembly.
| Point | Details |
|---|---|
| Choose IP67 as your floor | Anything mounted outside the cabin needs at least IP67 for dust and temporary immersion protection. |
| Prioritize sky-facing placement | Plastic, glass, or fiberglass above the unit beats deep concealment behind steel every time. |
| Match method to permanence needs | Use magnetic cases for temporary installs, hardwiring for fleet vehicles needing continuous, tamper-resistant tracking. |
| Test before you finish | Confirm a live fix and run a short drive test before installing permanent fasteners or sealing panels shut. |
| Inspect seals on a schedule | Check gaskets and cable glands every 90 days under heavy washdown exposure, twice yearly otherwise. |
| Motowatchdog fits continuous-tracking needs | Its subscription-free hardware, long battery life, and geofencing alerts suit hardwired installs built for years of outdoor reliability. |
An Honest Take on What Actually Matters Here
Most mounting advice online obsesses over hiding the tracker, and that’s backward. Concealment matters, but it’s the second priority, not the first. Signal comes first, because a perfectly hidden tracker that can’t get a fix is worse than a slightly visible one that reports reliably every time. The installers who get called back for warranty issues are almost always the ones who tucked a unit behind thick steel to win the concealment game and lost the signal game instead.
The other overrated variable is the IP number itself. IP68 sounds impressive on a spec sheet, but a properly sealed IP67 case in a dry-mounted, sky-facing spot outlasts an IP68 unit installed where it sits in standing water and salt spray daily. Rating is a floor, not a guarantee, and the gasket you inspect every 90 days matters more than the number stamped on the housing.
If you take one thing from this guide, test the fix before you commit to fasteners. Every failed install this piece addresses traces back to skipping that one step.
— Louis
Get a Mount That Matches This Guide’s Standards
Motowatchdog builds toward the exact standards this guide lays out: long battery life so hardwired or battery-based installs don’t need constant attention, customizable geofencing alerts that depend on a signal path that doesn’t drop, and detailed mileage tracking for fleet reporting that only works when the mount holds up outdoors for years, not months. Unlike subscription-based trackers that lock you into monthly fees on top of hardware costs, Moto Watchdog is a one-time purchase, which matters if you’re outfitting more than one vehicle or piece of equipment.
If you’re mounting a tracker on a work truck, trailer, or piece of equipment that needs to report reliably through rain, road salt, and vibration, start with hardware built for that environment rather than retrofitting a consumer device meant for indoor use. Check out Moto Watchdog’s tracking devices to see which model fits your vehicle or fleet, and use the mounting steps above to get it installed right the first time.
Sources
The mounting and sealing advice above draws from installer-facing standards and field guidance rather than general consumer tips. A few sources carried the most weight:
- What is an IP rating? — Fedsig blog
- GPS tracker installation best practices — IoT Guide
- How to fit a telematics device — Nationwide Fleet Installations
These sources support the wiring safety steps, the sealing checklist, and the signal-verification process covered above, and they’re worth a direct read if you’re installing across a larger fleet.