
How to start saving money
Lorem ipsum dolor sit amet, consectetur adipiscing elit lobortis arcu enim urna adipiscing praesent velit viverra sit semper lorem eu cursus vel hendrerit elementum morbi curabitur etiam nibh justo, lorem aliquet donec sed sit mi dignissim at ante massa mattis.
- Neque sodales ut etiam sit amet nisl purus non tellus orci ac auctor
- Adipiscing elit ut aliquam purus sit amet viverra suspendisse potent
- Mauris commodo quis imperdiet massa tincidunt nunc pulvinar
- Excepteur sint occaecat cupidatat non proident sunt in culpa qui officia
Why it is important to start saving
Vitae congue eu consequat ac felis placerat vestibulum lectus mauris ultrices cursus sit amet dictum sit amet justo donec enim diam porttitor lacus luctus accumsan tortor posuere praesent tristique magna sit amet purus gravida quis blandit turpis.

How much money should I save?
At risus viverra adipiscing at in tellus integer feugiat nisl pretium fusce id velit ut tortor sagittis orci a scelerisque purus semper eget at lectus urna duis convallis. porta nibh venenatis cras sed felis eget neque laoreet suspendisse interdum consectetur libero id faucibus nisl donec pretium vulputate sapien nec sagittis aliquam nunc lobortis mattis aliquam faucibus purus in.
- Neque sodales ut etiam sit amet nisl purus non tellus orci ac auctor
- Adipiscing elit ut aliquam purus sit amet viverra suspendisse potenti
- Mauris commodo quis imperdiet massa tincidunt nunc pulvinar
- Adipiscing elit ut aliquam purus sit amet viverra suspendisse potenti
What percentege of my income should go to savings?
Nisi quis eleifend quam adipiscing vitae aliquet bibendum enim facilisis gravida neque. Velit euismod in pellentesque massa placerat volutpat lacus laoreet non curabitur gravida odio aenean sed adipiscing diam donec adipiscing tristique risus. amet est placerat in egestas erat imperdiet sed euismod nisi.
“Nisi quis eleifend quam adipiscing vitae aliquet bibendum enim facilisis gravida neque velit euismod in pellentesque”
Do you have any comments? Share them with us on social media
Eget lorem dolor sed viverra ipsum nunc aliquet bibendum felis donec et odio pellentesque diam volutpat commodo sed egestas aliquam sem fringilla ut morbi tincidunt augue interdum velit euismod eu tincidunt tortor aliquam nulla facilisi aenean sed adipiscing diam donec adipiscing ut lectus arcu bibendum at varius vel pharetra nibh venenatis cras sed felis eget.
A push notification GPS system sends an automated mobile alert the instant a device crosses a location boundary, like entering, leaving, or lingering inside a geofence. Three things determine whether that system works: the user must grant explicit location permission, the operating system (not your app) does the actual region monitoring, and final delivery still has to pass through Apple Push Notification service (APNs) or Firebase Cloud Messaging (FCM) like any other push.
Miss any one of those three pieces and the feature breaks in ways that are hard to debug later. Here’s what to lock in before you write a line of geofencing code:
- Permission first, code second. Without “Always” (iOS) or background location access (Android), your geofence callbacks silently stop firing.
- The OS owns the trigger. Location-based push systems rely on the device’s native geofencing APIs to detect transitions, not your app polling GPS in a loop.
- Delivery is still a push. Once a trigger fires, the event has to travel from your backend (or SDK) through FCM or APNs before it becomes a notification banner on the lock screen.
Key Takeaways
Reliable GPS-triggered push notifications require OS-level geofencing, explicit location permission, cooldown logic, and a privacy-first data policy working together, not any single piece alone.
| Point | Details |
|---|---|
| Permission comes first | Background or “Always” location access must be granted or geofence callbacks won’t fire reliably. |
| Let the OS do the watching | Native geofencing APIs conserve battery and reduce privacy exposure compared to continuous GPS polling. |
| Cooldowns prevent opt-outs | Cap alerts per zone per day, and use cluster logic in dense areas to avoid spamming users. |
| Minimize data collection | Store only the location data your feature genuinely needs, and avoid sensitive details in notification text. |
| Moto Watchdog handles it end-to-end | Its trackers and app deliver geofence-based push alerts with no monthly subscription fee. |
Table of Contents
- What Is Push Notifications GPS Technology, Exactly?
- How Does a Geofence Trigger Turn Into a Push Notification?
- What Are the Steps to Build a GPS-Triggered Push System?
- How Do iOS and Android Handle Location Push Differently?
- What Makes a Geo-Triggered Push Notification Actually Work?
- What Privacy and Security Rules Apply to Location Push?
- How Do You Test Geofence-Triggered Push Notifications?
- Where Do Location-Triggered Push Notifications Get Used?
- How Does Moto Watchdog Use Geofencing for Push Alerts?
- A Publisher’s Perspective on Useful Alerts Versus Overreach
- Get Geofence Alerts Without the Monthly Bill
- Where to Learn More About Geofencing and Push Delivery
- Sources
What Is Push Notifications GPS Technology, Exactly?
Location-based push, sometimes called geo-targeted alerts or geofencing notifications, sits at the intersection of two systems that were built independently: location sensing and mobile push delivery. Understanding the vocabulary here saves you from architecture mistakes later, because the terms aren’t interchangeable even though marketing copy often treats them that way.
A geofence is a virtual boundary drawn around a real-world coordinate, usually a circle defined by a center point and radius, though some platforms support custom polygons for irregular shapes like a warehouse footprint or a stadium perimeter. A beacon, by contrast, is a small Bluetooth Low Energy (BLE) transmitter placed at a fixed physical location. Beacons trigger proximity events at a much finer scale, often a few meters, which makes them useful for in-store aisle detection where GPS accuracy simply isn’t good enough.
Three trigger types cover almost every use case:
- Enter: fires when a device crosses into the defined boundary.
- Exit: fires when a device crosses back out.
- Dwell: fires only after the device has remained inside the boundary for a set duration, which filters out drive-by false positives.
Radius choice matters more than most developers assume early on. Retail proximity alerts commonly use radii between 200 and 500 meters, while geofencing platforms generally support a much wider range. Pushwoosh’s geo-campaign settings accept anywhere from 50 meters up to 100 kilometers, which tells you the technology scales from “you just walked past this store” to “you just entered this state.”
| Signal Type | Typical Accuracy | Power Cost | Best For |
|---|---|---|---|
| GPS | 5–20 meters outdoors | High | Large-radius geofences, vehicle and asset tracking |
| Wi-Fi positioning | 20–50 meters | Medium | Urban areas with weak GPS signal, indoor approximation |
| Bluetooth beacon (BLE) | 1–5 meters | Low | Aisle-level retail, indoor micro-zones |
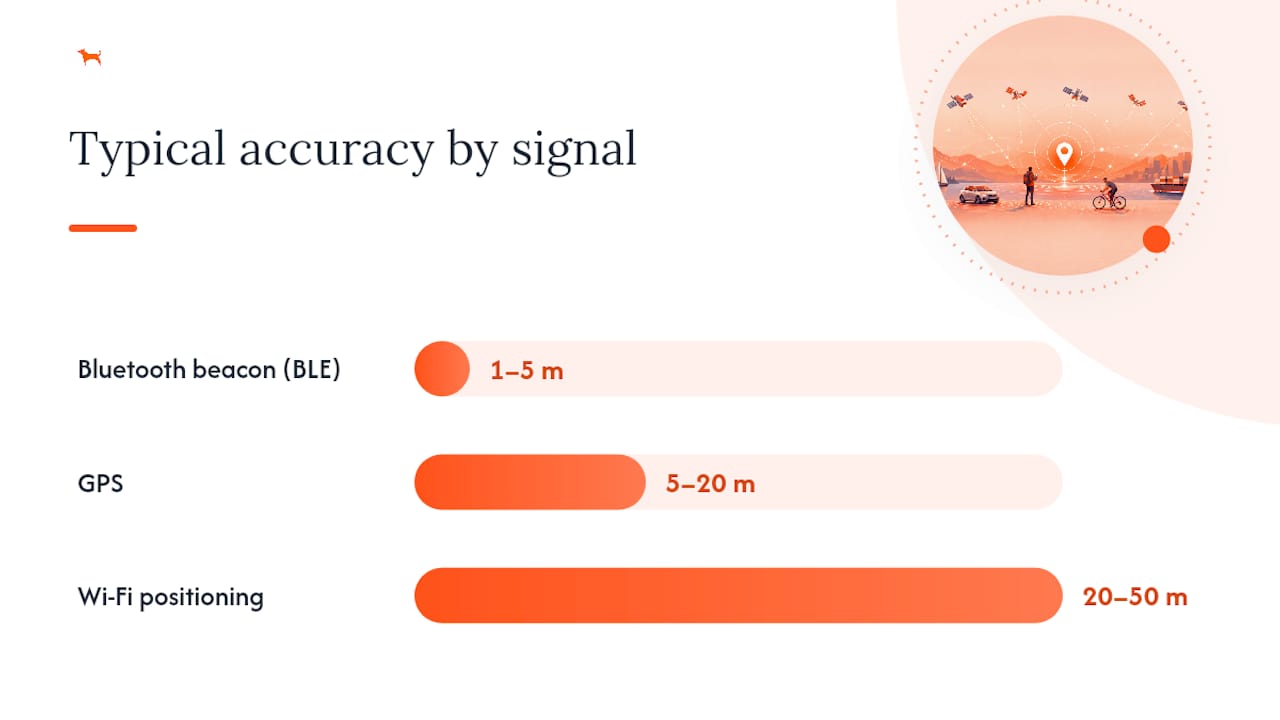
It’s worth separating location-triggered push from its two cousins. Behavior-triggered push fires on an in-app action, like abandoning a cart. Time-triggered push fires on a schedule, like a daily reminder at 8:00 AM. Location-triggered push is the only one of the three that depends on a physical event the app itself can’t predict, which is exactly why the OS has to be involved.
How Does a Geofence Trigger Turn Into a Push Notification?
The short version: a device event wakes the OS’s location service, the OS hands that event to your app’s SDK, your app or backend decides what to send, and the message travels through FCM or APNs before it reaches the screen. Every implementation, no matter how customized, follows some version of that chain.
Here’s the sequence in more detail:
- The device crosses a boundary. The phone’s location subsystem, using GPS, Wi-Fi, or cell tower triangulation, detects that the device has entered, exited, or dwelled inside a registered region.
- The OS intervenes, not your app. Both iOS (Core Location) and Android (Geofencing API) monitor registered regions at the system level, even when your app is backgrounded or terminated. The OS wakes your app’s SDK on a transition rather than requiring your code to run continuously.
- The SDK evaluates local rules or calls home. Depending on your architecture, the SDK may fire a local notification directly, or it may send the event to your backend for a decision (frequency capping, personalization, A/B testing).
- The backend or SDK builds the payload. This is where deep links, notification category, and analytics tags get attached to the message.
- The push provider delivers it. FCM handles Android delivery; APNs handles iOS delivery. Both services queue, retry, and finally hand the payload to the device’s OS-level push handler.
- The device renders the notification. The OS displays the banner, badge, or sound based on the payload’s configuration and the user’s notification settings.
A typical FCM payload for a geofenced arrival alert looks something like this:
{
  "message": {
    "token": "device_registration_token",
    "notification": {
      "title": "You're near Warehouse 4",
      "body": "Tap to log your arrival"
    },
    "data": {
      "deep_link": "app://geofence/warehouse-4",
      "category": "arrival_alert",
      "geofence_id": "wh4_zone1",
      "event_type": "enter"
    }
  }
}
An APNs payload carries similar fields, wrapped in the aps dictionary, with custom keys sitting alongside it for your app to parse:
{
  "aps": {
    "alert": {
      "title": "You're near Warehouse 4",
      "body": "Tap to log your arrival"
    },
    "category": "arrival_alert",
    "sound": "default"
  },
  "geofence_id": "wh4_zone1",
  "deep_link": "app://geofence/warehouse-4"
}
Pro Tip: Always favor OS-native geofencing over continuous GPS polling in the background. Polling drains battery fast and forces you to justify near-constant location access to users, which invites both App Store scrutiny and privacy complaints. Native geofencing lets the OS do the watching and only wakes your code when something actually happens.
What Are the Steps to Build a GPS-Triggered Push System?
The minimal working path is: request the right permissions, register your geofences with the OS, handle the transition callback, then send a payload through your push provider. Everything else, personalization, analytics, cooldowns, is refinement layered on top of that core loop.
- Integrate the platform SDK. On iOS, that’s Core Location’s
CLLocationManager. On Android, it’s theGeofencingClientfrom Google Play Services. - Design the permission request UX before writing code. A soft pre-prompt explaining why you need location, shown before the native OS dialog, measurably improves opt-in rates.
- Register your regions. Define center coordinates, radius, and trigger type (enter, exit, dwell) for each geofence, respecting each platform’s limit on concurrently monitored regions.
- Decide server-side vs. client-side logic. Client-side rules are faster and work offline; server-side rules let you update targeting without an app release. Most production systems use a hybrid: local trigger detection, server-side message composition.
- Construct the payload. Include a deep link, a notification category, and analytics tags so you can measure open rates per geofence.
- Add cooldown and dedup logic. Without it, a user who lingers near a boundary gets spammed every time GPS jitter nudges them back and forth across the line.
- Wire up analytics hooks. Track fires, deliveries, opens, and conversions per geofence ID so you can prune the zones that don’t perform.
A simplified geofence registration on Android looks like this:
val geofence = Geofence.Builder()
    .setRequestId("wh4_zone1")
    .setCircularRegion(lat, lng, 200f)
    .setExpirationDuration(Geofence.NEVER_EXPIRE)
    .setTransitionTypes(Geofence.GEOFENCE_TRANSITION_ENTER)
    .build()
Watch for these edge cases before they cost you a production incident:
- Force-stopped apps. On Android, if a user force-stops your app, geofence callbacks stop until the app is manually reopened.
- Device reboots. Registered geofences don’t always survive a restart; you need a
BOOT_COMPLETEDreceiver to re-register them. - Radius drift. GPS accuracy varies by environment, so a 200-meter geofence can trigger anywhere from 150 to 300 meters out depending on signal quality.
- Platform limits. iOS caps apps at 20 monitored regions at once; Android’s limit is 100. Plan a region-swapping strategy if you need more coverage than that.
Pro Tip: Log every geofence transition with a timestamp and accuracy value, even in production. When a user reports “I didn’t get the alert,” that log is often the only way to tell whether the OS never fired the event or your push payload failed silently downstream.
How Do iOS and Android Handle Location Push Differently?
iOS gates background location far more tightly than Android, while Android gives you more background flexibility but hands you a new problem: aggressive OEM battery managers that kill background processes Google never intended to restrict. Knowing which fight you’re in changes how you design the permission flow.
- iOS permission types: “When In Use,” “Always,” and, since iOS 14, a separate “Precise Location” toggle a user can disable independently. Geofencing requires “Always” to fire reliably in the background.
- iOS APIs:
CLLocationManagerhandles both standard location updates and region monitoring; region monitoring is the battery-efficient path for geofencing specifically. - iOS failure mode: if a user downgrades from “Always” to “When In Use” mid-session, geofence callbacks stop without any error thrown, so your app needs to check authorization status on every launch.
- Android permission types:
ACCESS_FINE_LOCATION,ACCESS_COARSE_LOCATION, and a separateACCESS_BACKGROUND_LOCATIONpermission required since Android 10 for any geofencing that needs to work while the app isn’t in the foreground. - Android APIs:
GeofencingClientandGeofencingRequestfrom Google Play Services handle registration; the OS delivers transitions through aPendingIntentbroadcast. - Android failure mode: manufacturer-specific battery optimization (common on Samsung, Xiaomi, and OnePlus devices) can kill your background service even when Android’s own APIs say it should keep running.
Practical fixes that hold up across both platforms: use a soft pre-prompt so users understand the “why” before the system dialog appears, request permissions in the correct sequence (coarse before fine, foreground before background), and test on real hardware from at least three different manufacturers rather than trusting emulator behavior alone. Build a fallback message path too. If a user denies background location, you can still send a manual “check in” push or ask them to open the app to refresh their status.
What Makes a Geo-Triggered Push Notification Actually Work?
The geo pushes that succeed combine three things at once: physical proximity, good timing, and evidence the user actually wants this information right now. Get any one of those wrong and you’re training users to swipe away or disable notifications entirely.
- Filter on relevant events only. Don’t fire a push for every geofence transition; filter by user segment, time of day, and whether the user has already been notified about this zone recently.
- Apply cooldowns and cluster logic. In dense environments like malls or downtown blocks with overlapping geofences, without cluster-wide cooldowns users get spammed by adjacent zones firing independently. A reasonable starting point is one geo push per user per zone per 24 hours, adjusted based on opt-out data.
- Cap frequency deliberately. Combining location with behavioral context measurably improves engagement, but only when the total volume stays low enough that each message still feels intentional.
- Write short, action-oriented copy. “You’re near Pickup Zone B, tap to confirm arrival” beats a vague “You have a notification” every time, because it tells the user exactly why they got interrupted.
- Build a fallback path. If permission is denied, don’t just drop the feature. Offer a manual check-in button or an in-app map view instead.
Pro Tip: Treat every geo push as a small trust transaction. Each one that feels irrelevant or poorly timed spends down goodwill you’ll need later for messages that actually matter, like a safety alert or a fraud warning.
What Privacy and Security Rules Apply to Location Push?
Privacy-first design isn’t a compliance checkbox here, it directly reduces opt-outs and legal exposure. Collect the minimum location data your feature actually needs, say so plainly in your permission prompt, and never let notification content leak more than the user expects.
Start with the collection and storage side:
- Ask only for what the feature requires. If dwell detection is enough, don’t request continuous background tracking.
- Sequence your permission requests. Ask for coarse location first if that’s sufficient, and only escalate to precise or background access when the use case genuinely demands it.
- Prefer ephemeral coordinates over long-term storage. If you don’t need historical location for reporting, don’t retain raw coordinates past the triggering event.
- Set explicit retention limits and document them, both internally and in your privacy policy.
- Anonymize or aggregate location data wherever the business use case allows it, particularly for analytics.
Security matters just as much as consent language. Large-scale analysis of notification SDKs found insecure APIs and ambiguous data handling across a substantial share of platforms studied, which means the provider you choose is part of your security posture, not just a delivery mechanism. Avoid putting sensitive location details directly in notification text. A lock-screen banner reading “You’ve arrived at 442 Elm Street” is visible to anyone glancing at the phone, and push notification content and metadata can be visible to platform operators and can persist in device backups long after the moment it was relevant.
Concern over location permissions isn’t fixed. It shifts with physical context. A 4-week study of 44 participants found that comfort with location sharing changed depending on whether someone was in a public or private setting, which suggests a one-time permission dialog can’t capture how people actually feel about being tracked over time.
That finding has a practical implication: consider designing permission requests and reminder prompts that acknowledge context, rather than treating a single “Allow” tap as permanent, unconditional consent.
How Do You Test Geofence-Triggered Push Notifications?
Test device movement, permission variations, and edge conditions early, because geofencing bugs almost never show up in a quick manual check. They surface after hours of real-world movement that a five-minute simulator run can’t replicate.
- Understand simulator limitations first. Simulators often lack the OS-level region monitoring behavior needed to reproduce real-world transitions, so treat simulator testing as a first pass, not a final validation.
- Use location spoofing tools on real devices. Xcode’s location simulation and Android Studio’s Extended Controls let you fake GPS coordinates on a physical device without actually driving to the test location.
- Capture transition logs with timestamps. Log every enter, exit, and dwell event with accuracy metadata so you can distinguish “the OS never fired this” from “the payload never arrived.”
- Validate push receipts on both providers. Use FCM’s delivery reports and APNs’ feedback service to confirm the message actually reached the device rather than silently failing at the provider level.
- Monitor delay and false-positive rates as real metrics, not afterthoughts. A geofence that fires 90 seconds late because of GPS lag behaves very differently from a user’s perspective than one that fires instantly.
- Reproduce intermittent failures methodically. Test across a force-stopped app state, a freshly rebooted device, and low-battery mode individually, since each triggers different OS throttling behavior.
- Test permission variations explicitly. Run your full suite with “Always,” “When In Use,” and denied permission states to confirm your fallback messaging actually appears when it should.
On iOS, console.app filtered by your app’s bundle identifier surfaces Core Location region monitoring events directly. On Android, adb logcat filtered by GeofencingApi shows registration success or failure, which is often where a silent bug hides.
Where Do Location-Triggered Push Notifications Get Used?
Geofencing notifications map cleanly onto four categories: marketing offers, logistics and pickup alerts, safety zones, and operational reminders. Each one calls for a different radius and cooldown setting, because the cost of an irrelevant alert varies a lot by context.
- Retail proximity offers: a 200 to 500 meter radius around a storefront, paired with a cooldown of once per day per user, works well for promotional pushes. Sample message: “You’re near our downtown store. Show this alert for 15% off today.”
- Curbside pickup arrival: a tight 100 to 150 meter radius around a parking lot entrance, fired once per order, tells staff exactly when to bring an order out. Sample message: “You’ve arrived. We’re bringing your order out now.”
- Equipment-entry alerts for fleets: a radius matched to the actual yard or job-site boundary, often 100 to 300 meters, flags unauthorized movement of vehicles or trailers.
- Theft-zone warnings: wider dwell-based geofences around high-theft areas trigger an alert if a tracked asset lingers longer than expected. Sample message: “Your trailer has been stationary in a flagged area for 20 minutes.”
- Arrival and departure messaging for logistics: enter and exit triggers at a warehouse or distribution hub, combined with a short cooldown, keep dispatchers updated without flooding their notification feed.
How Does Moto Watchdog Use Geofencing for Push Alerts?
Moto Watchdog pairs a physical GPS tracking device with a companion app to deliver geofence-based push alerts, without charging a recurring subscription fee for the privilege. That distinction matters for fleet managers and families alike, since most tracking platforms bill monthly per device, and those fees compound fast once you’re managing more than a handful of vehicles or trailers.
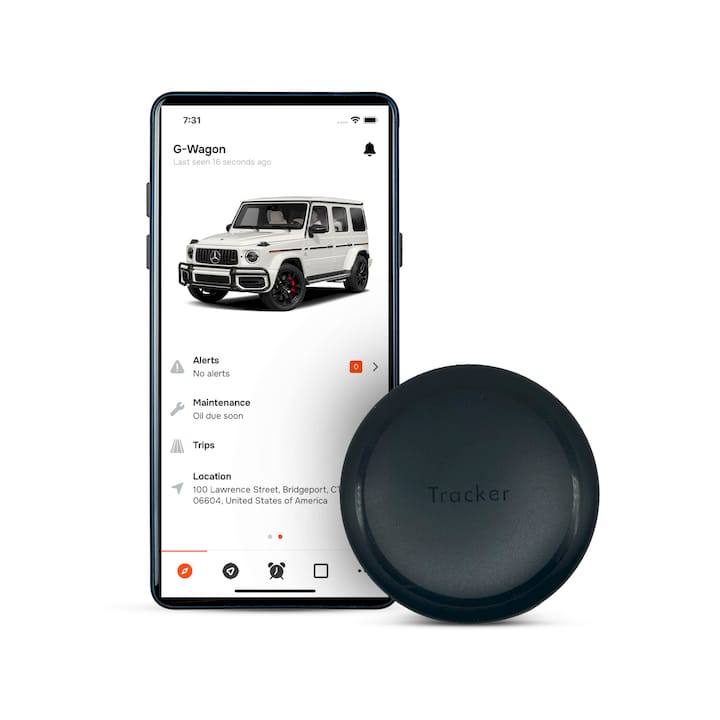
The hardware handles the location-sensing half of the equation; the app handles registration, alert configuration, and push delivery, following the same OS-level geofencing model described earlier in this guide.
| Feature | What It Does | Why It Matters for Geofencing |
|---|---|---|
| Real-time location tracking | Reports device position continuously via GPS | Feeds accurate coordinates into geofence boundary checks |
| Customizable geofencing and alerts | Lets users draw zones and set enter/exit triggers | Directly supports the enter/exit/dwell model developers build against |
| Long battery life | Extends device operation between charges | Reduces the trade-off between frequent location checks and power drain |
| Push notifications | Sends mobile alerts on geofence events | Delivers the final push once a boundary transition fires |
| Multi-device management | Manages several trackers from one app | Useful for fleets running geofences across many vehicles or assets |
A typical implementation looks like this: the tracker reports position to Moto Watchdog’s backend, the backend checks that position against user-defined geofence boundaries, and a triggered boundary event generates a push notification delivered to the companion app. For fleet managers wiring trackers into vehicles for continuous power, that setup means alerts keep firing reliably without worrying about a device losing charge mid-route.
For personal use, a common configuration sets a home or work geofence with an exit-only trigger, so a family member gets a push the moment a vehicle leaves an expected zone, without a monthly bill attached to that peace of mind. Businesses running tracking on a tighter budget get the same geofence-and-push architecture without paying more as their fleet grows.
A Publisher’s Perspective on Useful Alerts Versus Overreach
I think the industry’s default answer to “how do we make geo push work better” is almost always “collect more location data,” and that’s backward. The systems that actually earn a long-term place on someone’s home screen are the ones that ask for the least access they can get away with and still deliver something worth the interruption. A geofence that fires once a day with genuinely useful context beats a system that fires ten times with a slightly higher hit rate on ad clicks, because the second one trains users to disable notifications entirely within a week. Build for the alert a user would forward to a friend, not the one your growth dashboard rewards this quarter.
Get Geofence Alerts Without the Monthly Bill
If you’ve read this far as a fleet manager or someone tracking a vehicle a family member drives, you already know the technical lift behind geofencing and push delivery isn’t trivial to build from scratch. Motowatchdog skips that build entirely: it’s hardware and an app that already does the enter, exit, and dwell detection this guide walks through, and it does it without charging a recurring fee for the privilege.
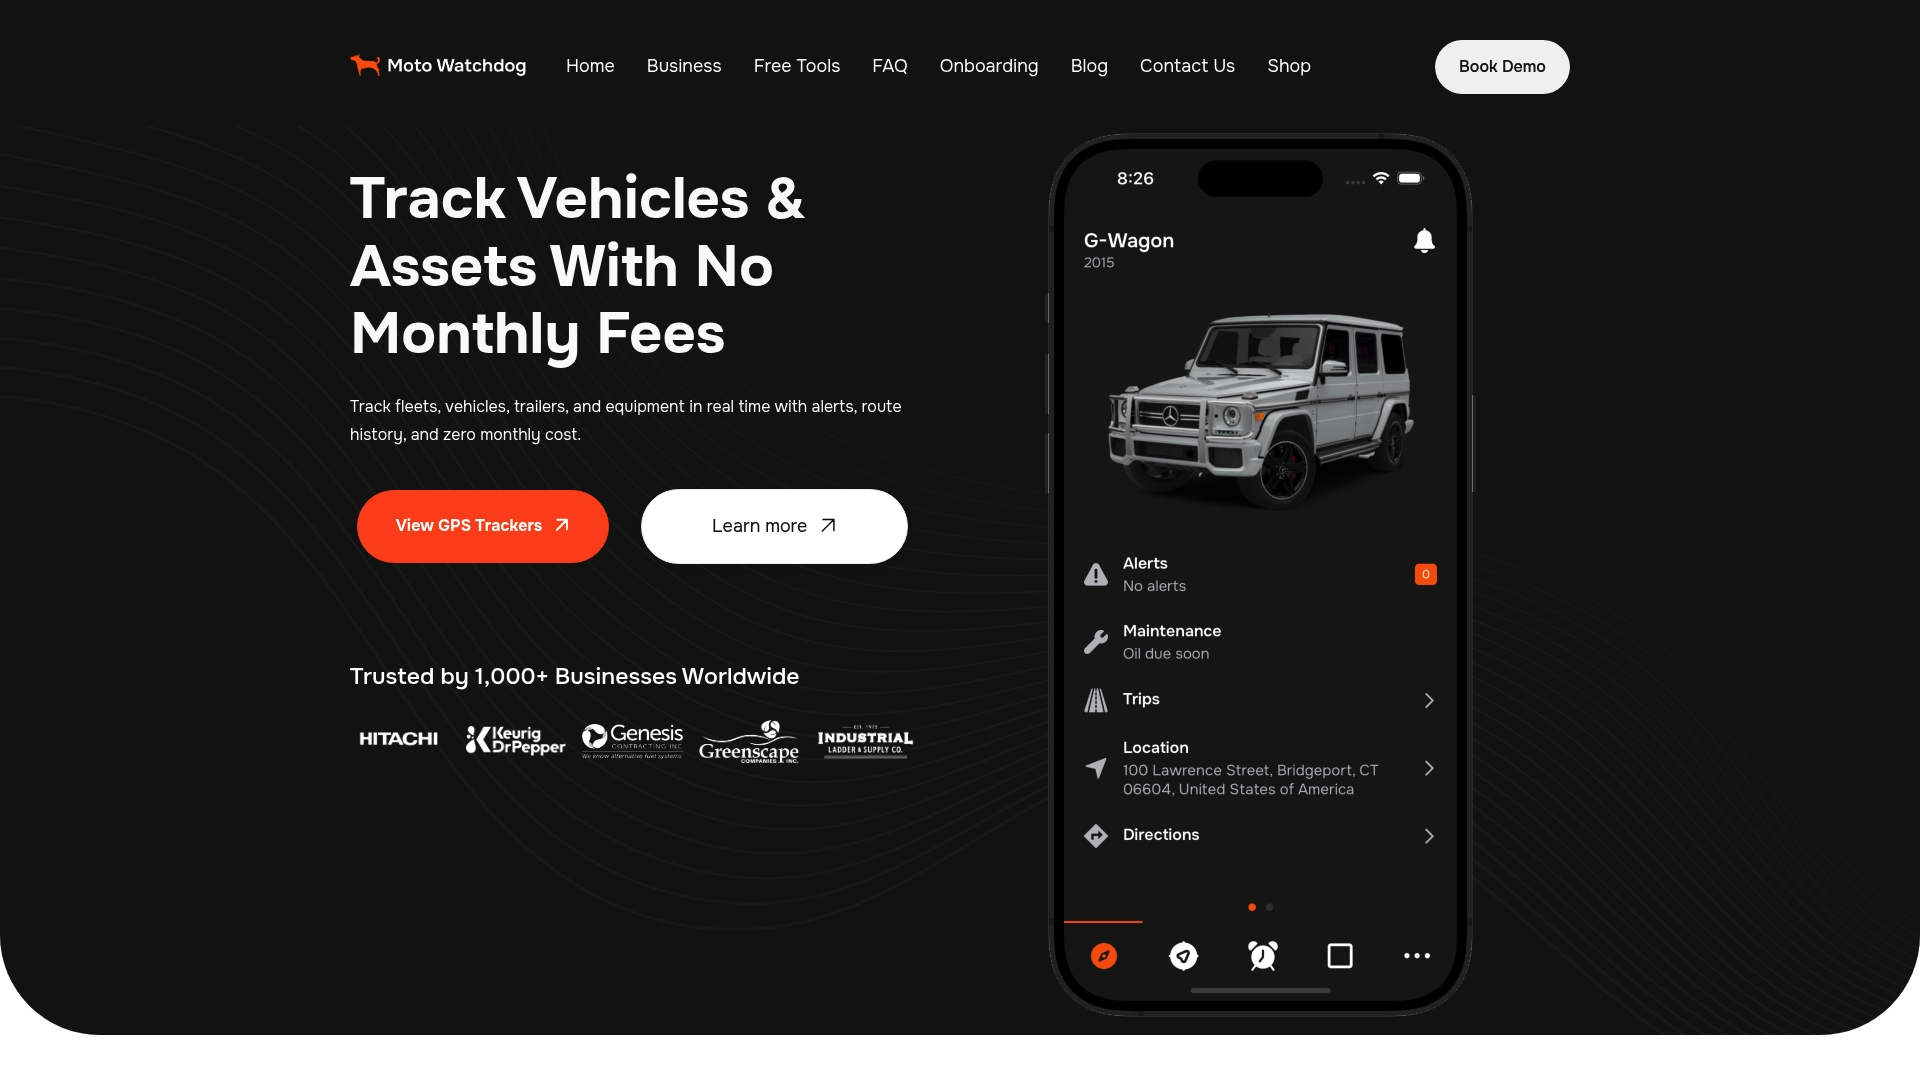
That matters most for anyone managing multiple vehicles or assets, where per-device monthly costs from other providers add up fast as a fleet grows. Setup runs through pairing the tracker with the companion app and drawing your first geofence directly on the map, no server-side code required on your end. Check out the Moto Watchdog GPS tracking devices to see current models and get one running on your first vehicle or asset today.
Where to Learn More About Geofencing and Push Delivery
Start with platform documentation if you’re implementing this feature, and turn to the privacy research once your architecture is in place and you’re assessing risk.
- Apple’s Core Location and region monitoring documentation covers the enter/exit/dwell model developers rely on most.
- Pushwoosh’s geo-campaign documentation details geozone ranges, cooldowns, and scheduling controls in production systems.
- OneSignal’s location-triggered event docs explain how SDK-level location sharing flags work in practice.
- The EFF’s analysis of push notification privacy risks is worth reading before you finalize what goes in your notification payloads.
- The empirical study on notification service security is dense but useful if you’re evaluating which push provider to trust with location data.
Sources
- Location-Based Push Notifications: How They Work & Best Use Cases
- Geo campaigns | Pushwoosh Documentation
- Systematic security & privacy exploration of mobile notification services (empirical study)
- How push notifications can betray your privacy — and what to do about it
- Contextual variation in user concern over permissions (experience sampling study)