How to start saving money
Lorem ipsum dolor sit amet, consectetur adipiscing elit lobortis arcu enim urna adipiscing praesent velit viverra sit semper lorem eu cursus vel hendrerit elementum morbi curabitur etiam nibh justo, lorem aliquet donec sed sit mi dignissim at ante massa mattis.
- Neque sodales ut etiam sit amet nisl purus non tellus orci ac auctor
- Adipiscing elit ut aliquam purus sit amet viverra suspendisse potent
- Mauris commodo quis imperdiet massa tincidunt nunc pulvinar
- Excepteur sint occaecat cupidatat non proident sunt in culpa qui officia
Why it is important to start saving
Vitae congue eu consequat ac felis placerat vestibulum lectus mauris ultrices cursus sit amet dictum sit amet justo donec enim diam porttitor lacus luctus accumsan tortor posuere praesent tristique magna sit amet purus gravida quis blandit turpis.

How much money should I save?
At risus viverra adipiscing at in tellus integer feugiat nisl pretium fusce id velit ut tortor sagittis orci a scelerisque purus semper eget at lectus urna duis convallis. porta nibh venenatis cras sed felis eget neque laoreet suspendisse interdum consectetur libero id faucibus nisl donec pretium vulputate sapien nec sagittis aliquam nunc lobortis mattis aliquam faucibus purus in.
- Neque sodales ut etiam sit amet nisl purus non tellus orci ac auctor
- Adipiscing elit ut aliquam purus sit amet viverra suspendisse potenti
- Mauris commodo quis imperdiet massa tincidunt nunc pulvinar
- Adipiscing elit ut aliquam purus sit amet viverra suspendisse potenti
What percentege of my income should go to savings?
Nisi quis eleifend quam adipiscing vitae aliquet bibendum enim facilisis gravida neque. Velit euismod in pellentesque massa placerat volutpat lacus laoreet non curabitur gravida odio aenean sed adipiscing diam donec adipiscing tristique risus. amet est placerat in egestas erat imperdiet sed euismod nisi.
“Nisi quis eleifend quam adipiscing vitae aliquet bibendum enim facilisis gravida neque velit euismod in pellentesque”
Do you have any comments? Share them with us on social media
Eget lorem dolor sed viverra ipsum nunc aliquet bibendum felis donec et odio pellentesque diam volutpat commodo sed egestas aliquam sem fringilla ut morbi tincidunt augue interdum velit euismod eu tincidunt tortor aliquam nulla facilisi aenean sed adipiscing diam donec adipiscing ut lectus arcu bibendum at varius vel pharetra nibh venenatis cras sed felis eget.
You have three ways to power a trailer GPS tracker: hardwire it to the trailer’s 12V or 24V system, run it on battery, or use a solar or solar-hybrid setup. For most trailer owners, a fused, hardwired connection is the default choice because it delivers continuous power and the most reliable reporting. Battery power fits portable or discreet placements, and solar or hybrid setups suit unpowered assets that sit outdoors for long stretches.
Which one fits your situation depends on how the trailer gets used:
- Fleet operators with dedicated trailers: hardwire to the 7-way plug for constant, maintenance-light monitoring.
- Owners who move trackers between trailers or need covert placement: battery-only units offer flexibility.
- Contractors with unpowered equipment trailers left outdoors: solar or hybrid systems reduce battery-swap trips.
Key Takeaways
Matching the powering method to your trailer’s actual usage pattern determines battery life and tracking reliability more than any single hardware spec.
| Point | Details |
|---|---|
| Default to hardwiring | Use a fused 12V or 24V tap for trailers in regular service, since it removes battery maintenance entirely. |
| Size fuses correctly | Install a 1 to 2 amp inline fuse close to the power source to protect the circuit from shorts. |
| Match reporting to power budget | Calculate daily mAh draw against your battery capacity before choosing a live or heartbeat mode. |
| Mix methods across a fleet | Hardwire active trailers and use battery or solar for idle or unpowered equipment. |
| Choose Moto Watchdog for flexibility | Its subscription-free devices support hardwire, battery, and solar-ready configurations across the same product line. |
Table of Contents
- Powering Trailer GPS Tracker Options: Which One Fits Your Trailer?
- How to Hardwire a GPS Tracker: A Step-by-Step Checklist
- Battery-Powered Trackers: Sizing, Runtime, and Placement
- Solar and Hybrid Power: Sizing a System That Actually Works
- How Reporting Frequency Changes Your Power Budget
- Mounting, Antenna Placement, and Tamper Resistance
- Testing and Commissioning Your Powered Tracker
- Keeping It Running: Maintenance and Troubleshooting
- What Most Guides Get Wrong About Trailer GPS Power
- Why Moto Watchdog Devices Fit Every Powering Method Covered Here
- Sources
Powering Trailer GPS Tracker Options: Which One Fits Your Trailer?
Hardwired systems draw directly from the trailer’s electrical circuit, usually through a fused tap into a constant 12V or 24V feed. That gives you an always-on device with no charge cycle to manage, which is why wired GPS trackers deliver richer telemetry and lower day-to-day maintenance than battery-only units. The tradeoff is installation time. You need access to a wiring point, a fuse, and a ground.
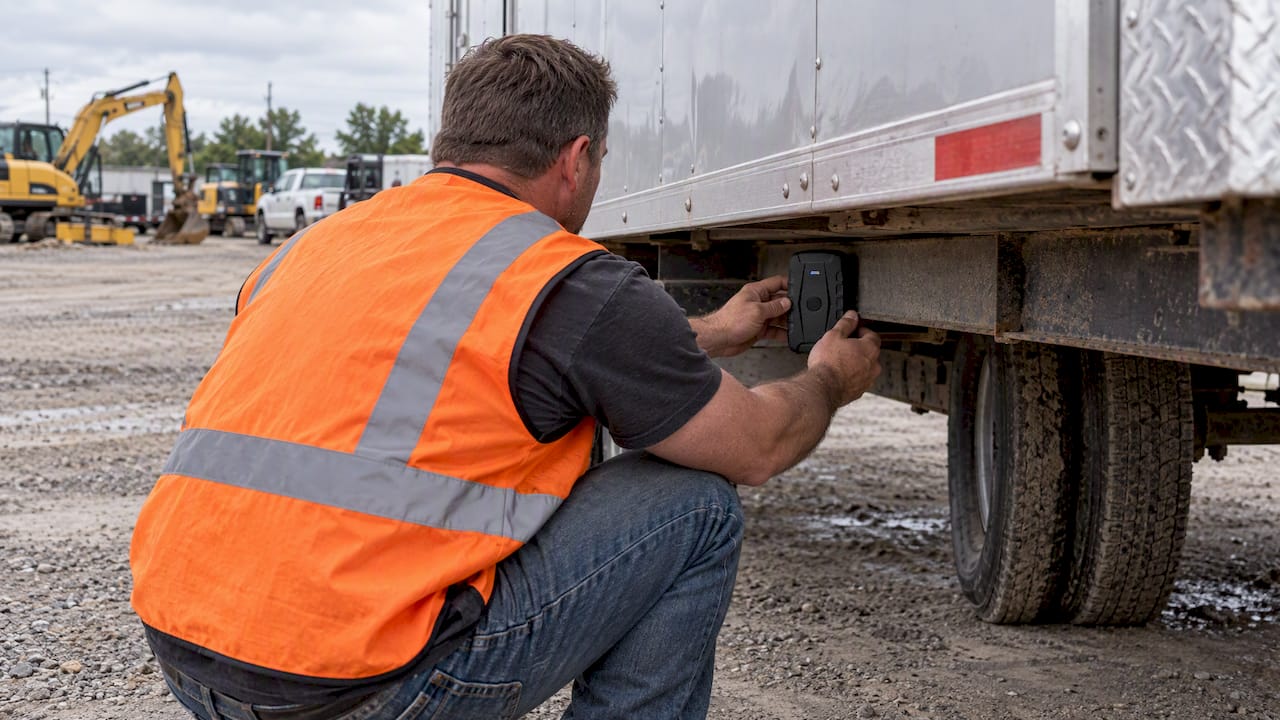
Battery-powered trackers skip the wiring entirely. You mount the unit, and it runs until the internal cell depletes. That portability makes battery trackers a natural fit for unpowered assets or covert placement, but it also means you own an ongoing maintenance task: tracking charge levels and swapping or recharging on a schedule.
Solar and hybrid units add a panel that trickle-charges an internal battery, which can stretch service intervals in sunny climates but adds upfront cost and mounting complexity.
Pro Tip: Don’t pick one method for your entire fleet. Many operators hardwire trailers that stay in daily rotation and use battery or solar for equipment that sits idle for weeks between jobs.
- Static storage trailers: battery or solar, since there’s no constant load and access for wiring may be limited.
- In-service delivery or hauling trailers: hardwired, for permanent power and frequent updates.
- Multi-trailer fleets: mixed deployment, matched to each trailer’s usage pattern rather than a single standard.
How to Hardwire a GPS Tracker: A Step-by-Step Checklist
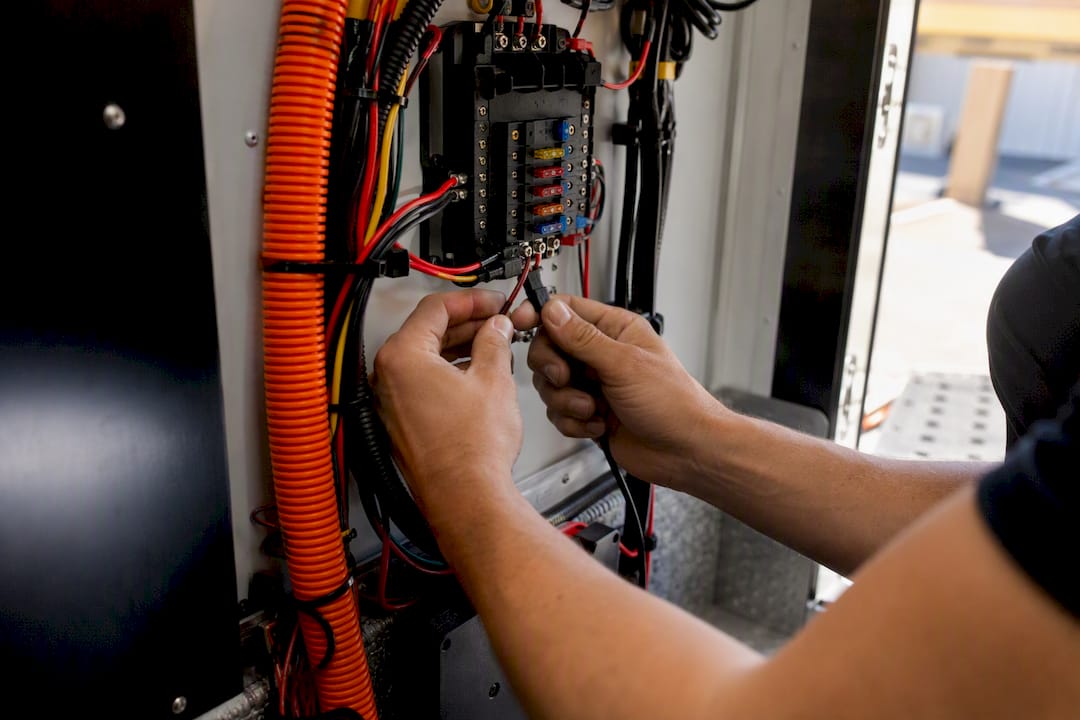
Hardwiring is not complicated, but skipping a step here is how you end up with a dead tracker or a blown fuse three weeks into a job. Start by identifying your power source. Most trailers give you two realistic options: the AUX or ABS constant feed on the 7-way connector, or a direct tap into a trailer battery bank if one is installed. Before you connect anything, check that source with a voltmeter to confirm it holds steady voltage with the tow vehicle disconnected.
Tools and materials you’ll need:
- Voltmeter or multimeter
- Wire strippers and crimping tool
- Inline fuse holder and fuses
- Ring terminals and waterproof connectors
- Heat-shrink tubing or electrical tape
- Drill (if routing through a bulkhead)
Most trailer GPS units accept a wide input range, commonly 9 to 30 volts DC, which gives you flexibility across 12V and 24V trailer systems. That range still needs protection.
- Isolate the circuit. Disconnect the trailer from the tow vehicle and confirm zero voltage on your intended tap before cutting or stripping any wire.
- Choose your tap point. Installation kits commonly route the tracker harness to the 7-way plug’s AUX/ABS constant feed when that circuit stays live regardless of ignition state.
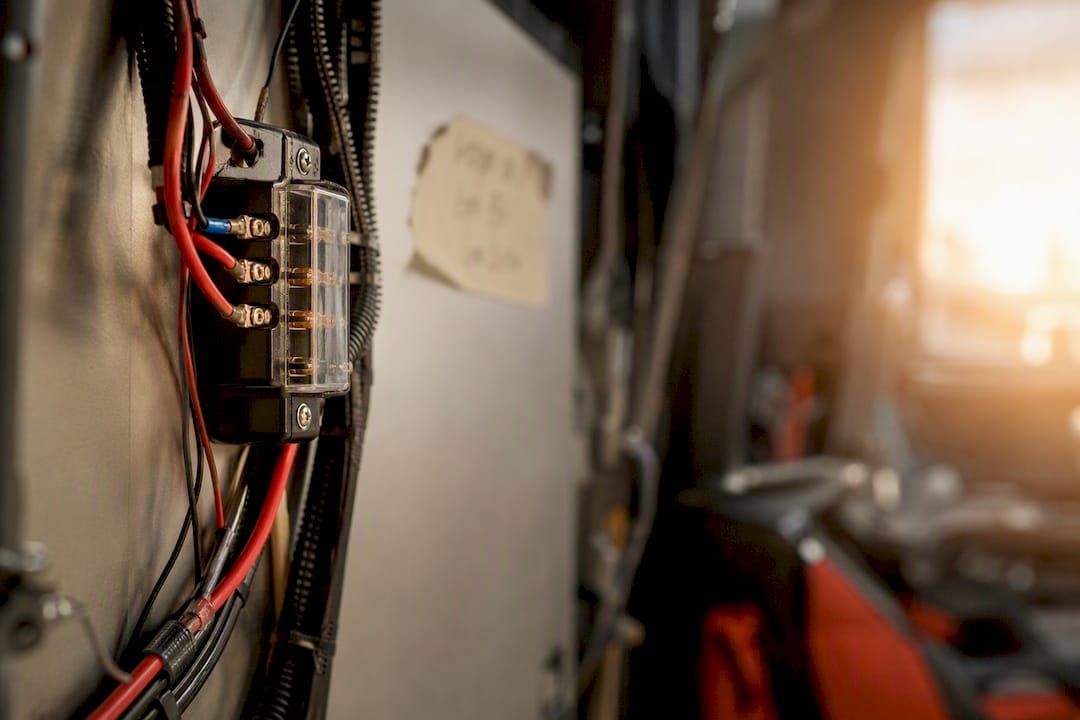
- Install the inline fuse. Use an appropriately rated fuse close to the power source to protect the wiring harness and trailer circuitry.
- Run and secure the harness. Route wire away from moving parts and sharp edges, securing every few inches with zip ties or wire loom.
- Ground the unit. Connect the ground wire to a clean, bare-metal point on the trailer chassis, not to a painted surface or a bolt shared with another circuit.
- Seal penetrations. Any hole drilled through a bulkhead needs a rubber grommet to keep moisture out.
- Power up and check LEDs. A fresh 12V connection wakes most devices from shipping hibernation; watch for the power, GPS search, and cellular search LED sequence to confirm the device is alive.
A dedicated fused connection matters more than it sounds. Never tap an ignition-switched circuit expecting continuous tracking. It only reports while the tow vehicle runs. Avoid unregulated auxiliary circuits that share load with lighting or brakes, and use dielectric grease or waterproof connectors at every splice to keep corrosion from eating your ground connection over a wet winter.
Pro Tip: Keep the original fuse rating documented on a piece of tape near the fuse holder. When a fuse blows six months from now, you’ll know instantly whether the replacement matches the original spec instead of guessing.
Battery-Powered Trackers: Sizing, Runtime, and Placement
Battery capacity gets measured in milliamp-hours (mAh) or amp-hours (Ah), and that number tells you how much charge the cell holds, not how long it will last on your trailer. Runtime depends entirely on how often the tracker reports.
A device drawing 20mA average in heartbeat mode, checking in once every few hours, sips power compared to the same device in live tracking mode, which can pull 10 times that draw continuously. A tracker with a 10,000mAh battery reporting every four hours might run for months. Switch that same device to live mode for daily monitoring, and you could be looking at days, not months, before it needs a recharge.
Mounting location matters as much as chemistry. Place the battery pack somewhere shielded from direct weather exposure, ideally inside a trailer compartment or under a fender well, while keeping the antenna within reasonable line-of-sight to open sky. A battery buried too deep in a metal enclosure protects the hardware but starves the signal.
- Replaceable cells: best when you need years of service without a charging routine, common in long-term asset tags.
- Rechargeable internal packs: better for trackers you handle regularly, since you can top off charge between deployments.
- Long-term storage tip: remove or disconnect the battery if a trailer sits unused for months, since reporting frequency is the single biggest driver of battery drain even at rest, and self-discharge continues regardless of use.
Treat battery replacement as a recurring task on your maintenance calendar, not a one-time purchase decision. A device that reports reliably for eight months and then goes dark without warning defeats the entire purpose of tracking.
Solar and Hybrid Power: Sizing a System That Actually Works
A solar setup works simply: a panel charges a battery, and the battery powers the tracker through the night or during cloudy stretches. A basic charge controller sits between the two to prevent overcharging, and some setups include a blocking diode so the battery doesn’t discharge back through the panel after dark.
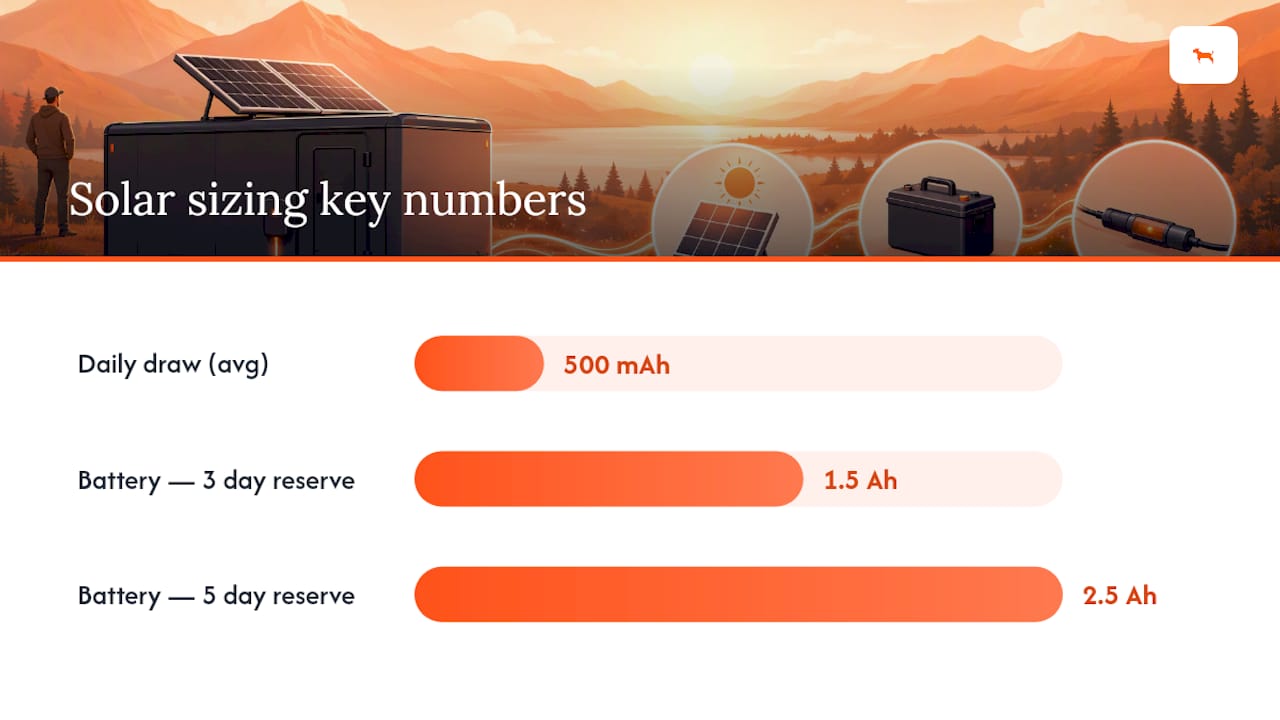
Sizing starts with your tracker’s average daily draw. Say your device consumes 500mAh per day at your chosen reporting frequency. You want at least three to five days of reserve for stretches of bad weather, which means your battery should hold 1,500 to 2,500mAh of usable capacity. From there, size the panel to replace that daily draw during average sunlight hours in your region, typically requiring a panel rated well above the raw wattage math suggests, since real-world charging efficiency rarely hits its rated peak.
- Calculate daily tracker consumption in mAh at your intended reporting interval.
- Add a three to five day buffer for cloud cover and shorter winter daylight.
- Convert that total to battery Ah and select a panel sized to recharge it within a typical sunny day.
- Choose a charge controller rated for your panel’s voltage and current output.
Mounting matters more on a trailer than on a rooftop. Tilt the panel to catch consistent sun rather than lying it flat, and check for shadows cast by roof racks, ladders, or cargo boxes at different times of day. Use tamper-resistant fasteners, since an exposed panel is also an exposed target.
Pro Tip: Solar isn’t a fix for a poorly chosen reporting interval. If your tracker is set to live mode, no panel small enough to mount on a trailer will keep up with that draw through a string of overcast days.
Solar and hybrid units can lower long-term maintenance in sunny climates, but they’re a poor fit for trailers stored in shaded lots or northern regions with short winter daylight. Know your deployment environment before you commit to the added cost.
How Reporting Frequency Changes Your Power Budget
Every mode your tracker offers trades battery life for visibility. Live tracking updates every few seconds and draws the most power. Heartbeat mode checks in at fixed intervals, maybe once an hour or once every few hours, and idles between reports. Wake-on-movement and accelerometer-triggered reporting sit in between, staying dormant until the trailer actually moves.
The math is straightforward once you have two numbers: average current draw in milliamps and the duty cycle, meaning what percentage of the day the device is actively transmitting versus sleeping.
- Multiply active-mode draw (mA) by the hours per day spent transmitting to get active mAh.
- Multiply sleep-mode draw by remaining idle hours to get idle mAh.
- Add the two for total daily mAh consumption.
- Divide your battery’s rated capacity by that daily figure to estimate days of runtime.
A trailer that moves daily and reports on a four-hour heartbeat will drain a battery far faster than the same trailer parked in long-term storage on a once-daily check-in. That gap is exactly why storage trailers and active work trailers need different reporting strategies, not the same default setting.
- Set aggressive reporting only when you genuinely need minute-by-minute location data.
- Use wake-on-movement for trailers that sit idle between jobs, since it eliminates power waste while stationary.
- Revisit your reporting interval seasonally. A setting that worked in summer daylight may drain a solar-hybrid setup faster in winter.
Pro Tip: If theft recovery is your main concern, a longer heartbeat interval paired with movement-triggered live mode gives you both battery life and a fast-response alert when it matters most.
Mounting, Antenna Placement, and Tamper Resistance
Where you mount the tracker affects both signal quality and how easily someone can find it. Metal trailer frames and cargo boxes block GPS and cellular signals, so avoid burying the device deep inside a fully enclosed metal compartment. Zones near the 7-way connector, forward-facing bulkheads, and the underside of a non-metal panel tend to perform well.
Antenna orientation matters as much as location. External antennas with roughly 3 dBi gain, mounted facing upward toward open sky, noticeably outperform internal antennas buried in an obstructed enclosure.
- Choose sealed enclosures rated IP67 or better for exposed mounting locations.
- Use mechanical fasteners rather than adhesive alone in high-vibration areas.
- Route wiring so the tracker isn’t visible from a casual glance under the trailer.
- Seal every grommet and connector to keep water and road grime out of the housing.
For theft recovery specifically, concealed routing paired with a strong external antenna improves both stealth and the odds of a fast recovery. Urban environments with tall buildings tend to degrade cellular and GPS signal more than open rural roads, so a marginal placement that works fine in a farm field might struggle downtown.
Testing and Commissioning Your Powered Tracker
Never walk away from a fresh install without confirming it actually works. Run through this checklist before trusting the tracker in the field:
- Power up the device and watch the LED sequence for power, GPS search, and cellular search states.
- Wait up to ten minutes in open sky for a full GPS fix, since acquisition can take that long on a cold start.
- Log into the companion app and confirm the reported location matches your actual position.
- Move the trailer a short distance and verify the app reflects that movement within your configured reporting interval.
Signal quality has real thresholds worth checking. A good fix should register a signal reading no weaker than around negative 95 dBm, with a reasonable number of satellites locked. Anything weaker suggests you need to reposition the antenna or relocate the unit away from metal shielding before you trust it with real cargo.
Keeping It Running: Maintenance and Troubleshooting
A powered tracker isn’t a set-and-forget device. Build a simple check routine: confirm battery voltage at the source, inspect the fuse for corrosion or looseness, and check connectors for the greenish buildup that signals moisture intrusion. Most tracking apps also flag low-battery conditions directly, so a quick glance at the dashboard once a month catches problems before the device goes dark.
Common failures are almost always mechanical, not electronic. A blown fuse usually means a wiring short somewhere downstream. Water ingress at a poorly sealed grommet corrodes connections slowly, so a tracker that worked fine for months can fail after one heavy storm. Antenna connectors loosen from vibration over rough terrain, weakening reception without fully cutting it off.
- Always disconnect power at the source before servicing any wiring or connector.
- Use only rated fuses and gauge-appropriate wiring, never a bypass or a larger fuse to “stop it from blowing.”
- Avoid unsecured quick-splice connectors. Crimped and sealed connections hold up far better under vibration and moisture.
What Most Guides Get Wrong About Trailer GPS Power
Most trailer GPS advice treats hardwiring, battery, and solar as competing choices you pick once and live with. That framing misses how trailers actually get used. A contractor running the same three trailers every week has a completely different power problem than someone with a dozen equipment trailers scattered across job sites for months at a time, and a single default setting solves neither well.
The bigger blind spot is reporting frequency. Owners obsess over battery specs and panel wattage while leaving the tracker on an aggressive live-mode setting that no battery or solar panel was ever going to sustain. Do the runtime math against your actual reporting interval before you spend money on a bigger battery or a solar upgrade. Half the “battery didn’t last” complaints trace back to a setting, not a hardware failure.
If there’s one priority worth acting on first, it’s matching power method to how the trailer actually moves, not how it’s classified on paper. A “static” trailer that gets towed twice a month behaves more like an active asset than owners assume, and that changes which power method makes sense.
Why Moto Watchdog Devices Fit Every Powering Method Covered Here
Every hardwiring, battery, and solar approach in this guide assumes you have a tracker flexible enough to handle it, and that’s the gap Moto Watchdog was built to close. Its devices run on a subscription-free model, so once you’ve solved the powering side, you’re not paying a recurring fee on top of it.
Moto Watchdog’s hardware supports the fused hardwire connections detailed above, works across long-life battery models for portable or covert placement, and includes solar-ready options for trailers that sit outdoors between jobs. Geofencing alerts and low-battery notifications mean you find out about a power problem from the app, not from a trailer that’s gone dark for a week. If you’re weighing how a subscription-free device changes your total cost against a monthly-fee competitor, the math tends to favor a one-time purchase fast, especially across multiple trailers.
Check the current lineup and match a model to the powering method that fits your trailer at Moto Watchdog’s product page.
Sources
Before you start any installation, pull your device’s manufacturer voltage specs and wiring harness documentation so fuse sizing matches the actual hardware, not a generic estimate. Vehiclepath’s standard installation guide covers 7-way tap procedures in detail, while EAGLEi’s comparative guide to trailer tracker types is worth a second read once you’ve narrowed down a power method.
- Thecarresource
- Types of GPS Trailer Tracking Devices: A Comparative Guide – EAGLEi GPS
- Hardwired vs Battery GPS Trackers for UK Fleets