How to start saving money
Lorem ipsum dolor sit amet, consectetur adipiscing elit lobortis arcu enim urna adipiscing praesent velit viverra sit semper lorem eu cursus vel hendrerit elementum morbi curabitur etiam nibh justo, lorem aliquet donec sed sit mi dignissim at ante massa mattis.
- Neque sodales ut etiam sit amet nisl purus non tellus orci ac auctor
- Adipiscing elit ut aliquam purus sit amet viverra suspendisse potent
- Mauris commodo quis imperdiet massa tincidunt nunc pulvinar
- Excepteur sint occaecat cupidatat non proident sunt in culpa qui officia
Why it is important to start saving
Vitae congue eu consequat ac felis placerat vestibulum lectus mauris ultrices cursus sit amet dictum sit amet justo donec enim diam porttitor lacus luctus accumsan tortor posuere praesent tristique magna sit amet purus gravida quis blandit turpis.

How much money should I save?
At risus viverra adipiscing at in tellus integer feugiat nisl pretium fusce id velit ut tortor sagittis orci a scelerisque purus semper eget at lectus urna duis convallis. porta nibh venenatis cras sed felis eget neque laoreet suspendisse interdum consectetur libero id faucibus nisl donec pretium vulputate sapien nec sagittis aliquam nunc lobortis mattis aliquam faucibus purus in.
- Neque sodales ut etiam sit amet nisl purus non tellus orci ac auctor
- Adipiscing elit ut aliquam purus sit amet viverra suspendisse potenti
- Mauris commodo quis imperdiet massa tincidunt nunc pulvinar
- Adipiscing elit ut aliquam purus sit amet viverra suspendisse potenti
What percentege of my income should go to savings?
Nisi quis eleifend quam adipiscing vitae aliquet bibendum enim facilisis gravida neque. Velit euismod in pellentesque massa placerat volutpat lacus laoreet non curabitur gravida odio aenean sed adipiscing diam donec adipiscing tristique risus. amet est placerat in egestas erat imperdiet sed euismod nisi.
“Nisi quis eleifend quam adipiscing vitae aliquet bibendum enim facilisis gravida neque velit euismod in pellentesque”
Do you have any comments? Share them with us on social media
Eget lorem dolor sed viverra ipsum nunc aliquet bibendum felis donec et odio pellentesque diam volutpat commodo sed egestas aliquam sem fringilla ut morbi tincidunt augue interdum velit euismod eu tincidunt tortor aliquam nulla facilisi aenean sed adipiscing diam donec adipiscing ut lectus arcu bibendum at varius vel pharetra nibh venenatis cras sed felis eget.
A GPS geofence is a virtual boundary drawn on a map that triggers an event the moment a tracked device enters or exits it. Set one up correctly and you get real-time alerts and a logged event history for security, billing, or driver accountability. Getting there takes three moves: draw the zone, configure who gets notified and how, then test and tune it until the alerts you receive are the ones you actually need.
TL;DR:
- Using a polygon instead of a radius reduces false alerts in areas with close neighbors or busy streets, especially when billing disputes arise.
- Testing should involve driving or walking through the zone to verify event logging and notification delivery before production deployment.
- Prioritizing alert severity tiers and owner assignment over precise boundary geometry improves system trust within the team.
- Buffer zones and a 60 to 90-second confirmation window effectively minimize false positives caused by GPS drift.
- Repeated offline or noisy device signals often stem from device settings or placement issues, not hardware failure.
Table of Contents
- How Do You Set Up a GPS Geofence Step by Step?
- Circle, Polygon, or Corridor: Which Geofence Shape Do You Need?
- What’s the Best Way to Route Geofence Alerts?
- How Do You Test and Tune a Geofence to Cut False Alerts?
- Why Isn’t My Geofence Triggering Correctly?
- What Actually Makes a Geofence Setup Reliable in the Field
- What Should You Actually Prioritize When Setting Up a Geofence?
- Ready to Put a Geofence on Your Own Fleet?
- Where to Learn More About Geofence Setup
- Sources
How Do You Set Up a GPS Geofence Step by Step?
Before you draw anything, run a quick pre-flight check. Confirm the device is online, your app or dashboard is signed in, location permissions are active, and the device is already assigned to the right group. Skipping this step is the single biggest reason a new geofence looks broken on day one when the real problem is a permissions toggle.
Once that’s confirmed, follow this build sequence:
- Open the map or zones tool in your tracking dashboard and search for the address, or drop a pin manually on the site you want to monitor.
- Pick a boundary type. Circle for a quick radius, polygon for an irregular property line, corridor for a route.
- Draw the zone. For a circle, click the center point and drag to set the radius. For a polygon, plot each vertex around the property line. Name it something a dispatcher will actually recognize later, like “Yard 3, North Gate,” not “Zone 12.”
- Set the trigger type. Choose enter, exit, or dwell, and define a timing window if the rule only matters during certain hours, such as after-hours yard access versus normal work shifts.
- Assign recipients and delivery channels. Decide who gets a push notification, SMS, email, or webhook, and set the severity so it’s clear which alerts need immediate action.
- Save and attach the zone to specific devices or an entire group, then save it as a template if you’ll be replicating it across similar sites.
Most vendor dashboards follow this same three-step logic of picking a device, drawing a zone, and saving it, even when the button layout differs from platform to platform. SDK-level quick-start checklists mirror the same pattern for developers: request permissions, define the geofence, add an event handler, test it, then optimize for battery.
If you’re rolling out zones across multiple sites, batch the work:
- Build one template zone per site type (yard, jobsite, depot) and duplicate it rather than starting from scratch each time.
- Name zones with a consistent convention (site, gate, shift) so reports stay sortable.
- Assign groups instead of individual devices wherever possible, so new vehicles inherit the right rules automatically.
Pro Tip: Draw your first few zones during working hours while you can watch a real vehicle cross the boundary live. Watching one true enter/exit event beats guessing at radius size from a satellite photo.
Circle, Polygon, or Corridor: Which Geofence Shape Do You Need?
The shape you pick determines how many false alerts you’ll be cleaning up next week. A circle (radius) is the fastest to draw: one center point, one distance. It’s ideal for large, open areas like a rural lot, a farm, or a rental yard with no close neighbors. A polygon traces the actual property line, which matters when buildings sit close together or a site butts up against a public street. A corridor is a thin polygon that follows a route, useful for monitoring whether a truck strays off an approved delivery path.
Circles are quick but sloppy in tight spaces. Polygons take a few more minutes to draw but hold their shape against the messiness of real-world geography.
- Circle: best for open, isolated areas with no nearby competing addresses.
- Polygon: best for urban sites, warehouses, or any property sharing a fence line with something you don’t want to track.
- Corridor: best for route compliance and detecting unauthorized detours.
In dense or mixed-use areas, switching from a radius to a custom polygon reduces false-positive visit counts by a substantial percentage by keeping the boundary off adjacent streets and lots. If a radius zone is generating repeated false enter or exit events, or if billing disputes keep pointing back to the same site, that’s your signal to convert it to a polygon.
What’s the Best Way to Route Geofence Alerts?
An alert only helps if the right person sees it and knows what to do. Common triggers include enter (a vehicle arrives at a jobsite), exit (equipment leaves a yard without authorization), and dwell (a truck sits idle somewhere it shouldn’t).
Sort every alert by severity before it ever reaches an inbox:
- Critical: after-hours exit from a secure yard, unauthorized movement of high-value equipment. Route straight to the fleet manager or owner, by SMS or push.
- High: unexpected dwell at a non-work site. Route to a supervisor.
- Medium: late arrival at a scheduled jobsite. Route to dispatch.
- Informational: routine arrivals and departures during work hours. Log only; no notification needed.
Use time windows to suppress the noise that doesn’t need a human. A truck entering the yard at 8 a.m. on a workday is not news. That same truck leaving at 2 a.m. is.
- Assign an owner to every severity tier.
- Set an acknowledgment expectation, such as a critical alert requiring a response within 15 minutes.
- Escalate automatically to a second contact if no one acknowledges in time.
Teams that skip severity tiers tend to route every alert to everyone, and everyone eventually mutes the whole system. A minimal, workable setup usually needs just two channels: push notifications for real-time response and email or webhook logging for the paper trail.
Pro Tip: If more than one person is muting notifications within the first week, your severity tiers are wrong, not your team.
How Do You Test and Tune a Geofence to Cut False Alerts?
Test before you trust. Drive or walk a device through the boundary to simulate an enter and exit, confirm the event lands in your logs, and check that the notification actually arrives on the channel you assigned. If you’re using a dwell trigger, park inside the zone long enough to confirm the threshold fires at the right time, not five minutes too early or late.
- Simulate an enter, exit, and dwell event and confirm each one logs correctly.
- Verify the notification reaches the assigned recipient on the assigned channel.
- Check timing accuracy against your configured dwell threshold.
- Adjust buffer distance if the zone triggers too early or too late.
- Add a confirmation window if GPS drift is causing phantom exits.
| Tuning Knob | Typical Starting Point | What It Fixes |
|---|---|---|
| Confirmation window | 60 to 90 seconds | False exits from momentary GPS drift |
| Check/poll interval | 5 seconds | Balances responsiveness against battery drain |
| Dwell threshold | About 60 seconds | Prevents brief stops from triggering dwell alerts |
| Buffer distance | Site-specific | Reduces edge-crossing noise near boundary lines |
A 60 to 90 second confirmation window filters out the momentary signal jitter that causes a parked truck to appear to leave and immediately return. Watch false positives, missed events, and dwell-time variance during the first month, and expect most zones to need one or two tuning passes before they settle.
Why Isn’t My Geofence Triggering Correctly?
Most geofence problems trace back to permissions, signal, or device settings, not the zone itself. On iOS and Android, background location access has to stay enabled, since a device that only reports location while the app is open will miss enter and exit events that happen in the background.
GPS drift usually means the device is mounted somewhere that blocks a clean sky view, or the check interval is too slow. Try repositioning the device, shortening the poll interval, enabling high-accuracy mode, or turning off aggressive battery-saving settings that throttle location updates.
- Noisy triggers: add a buffer, extend the confirmation window, or convert the zone to a polygon.
- Offline devices: check battery level, sleep mode settings, and SIM connectivity before assuming a hardware failure.
- Before contacting support, collect a screenshot of the zone, the device’s last known location, and a timestamp of the missed or false event.
Pro Tip: A device that’s “offline” for exactly the same few hours every day is usually asleep, not broken. Check its power-saving schedule first.
What Actually Makes a Geofence Setup Reliable in the Field
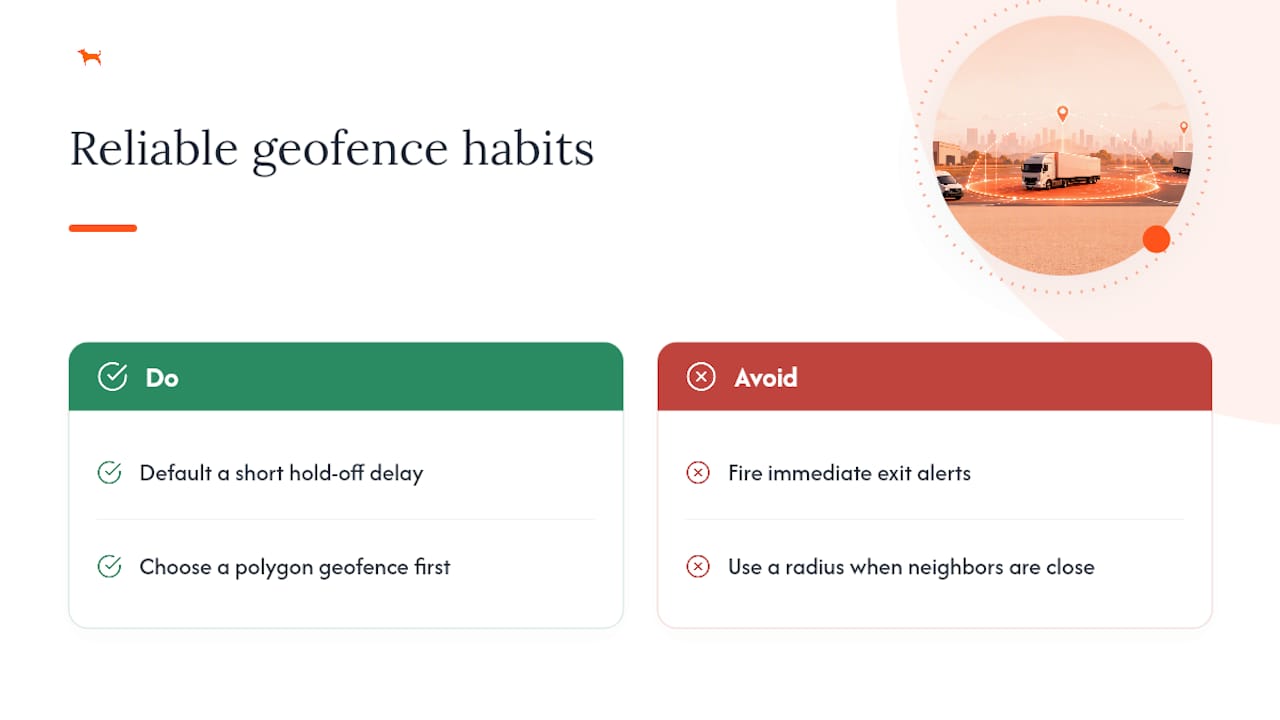
Moto Watchdog’s subscription-free 4G trackers support customizable geofencing with no monthly fee, backed by long battery life across devices used by more than 1,000 businesses. Two habits carry over from real deployments: default to a short hold-off delay before firing exit alerts, and reach for a polygon first on any site with close neighbors. Both cut the false-positive rate before you ever have to troubleshoot it.
What Should You Actually Prioritize When Setting Up a Geofence?
Most guides treat geofence setup as a drawing exercise: pick a shape, save it, done. That’s backwards. The zone is the easy part. What separates a system your team trusts from one everyone mutes within a week is the alert routing and the tuning cadence that follows it.
The conventional advice undersells testing. A geofence that isn’t driven through, walked through, or simulated before go-live is a guess dressed up as a feature. Spend your first hour on severity tiers and owner assignment, not on perfecting a polygon’s fifteenth vertex.
If you take one thing from this guide, prioritize the confirmation window and severity routing before precision geometry. A slightly imperfect polygon with a 90 second confirmation window and the right person getting the right alert will outperform a pixel-perfect boundary that pings the wrong inbox at 3 a.m. Fix the geometry once you’ve confirmed the routing works, not before.
— Louis
Ready to Put a Geofence on Your Own Fleet?
Subscription-free 4G GPS trackers are available with customizable geofencing and long battery life, allowing payment once for the hardware instead of adding another monthly line item to the fleet budget. That matters most for owner-operators and small fleets where a $20 to $40 monthly tracking fee per vehicle adds up fast across a dozen trucks.
If you manage a contractor fleet, the contractor vehicle tracking page walks through device options built for jobsite geofencing specifically. Families and individuals tracking a single vehicle or asset can start on the main Moto Watchdog page to compare devices and see setup requirements before buying. Once your tracker arrives, run through the testing and tuning steps above before you rely on it for anything security-critical or billing-related.
Where to Learn More About Geofence Setup
For platform-specific instructions, FollowMee’s geofence setup guide shows the standard device-draw-save workflow. The Volpis fleet geofencing breakdown covers rollout cadence and confirmation windows in more depth. Developers building custom logic can reference the expo-osm-sdk geofencing docs for tuning parameters like dwell thresholds and poll intervals.