How to start saving money
Lorem ipsum dolor sit amet, consectetur adipiscing elit lobortis arcu enim urna adipiscing praesent velit viverra sit semper lorem eu cursus vel hendrerit elementum morbi curabitur etiam nibh justo, lorem aliquet donec sed sit mi dignissim at ante massa mattis.
- Neque sodales ut etiam sit amet nisl purus non tellus orci ac auctor
- Adipiscing elit ut aliquam purus sit amet viverra suspendisse potent
- Mauris commodo quis imperdiet massa tincidunt nunc pulvinar
- Excepteur sint occaecat cupidatat non proident sunt in culpa qui officia
Why it is important to start saving
Vitae congue eu consequat ac felis placerat vestibulum lectus mauris ultrices cursus sit amet dictum sit amet justo donec enim diam porttitor lacus luctus accumsan tortor posuere praesent tristique magna sit amet purus gravida quis blandit turpis.

How much money should I save?
At risus viverra adipiscing at in tellus integer feugiat nisl pretium fusce id velit ut tortor sagittis orci a scelerisque purus semper eget at lectus urna duis convallis. porta nibh venenatis cras sed felis eget neque laoreet suspendisse interdum consectetur libero id faucibus nisl donec pretium vulputate sapien nec sagittis aliquam nunc lobortis mattis aliquam faucibus purus in.
- Neque sodales ut etiam sit amet nisl purus non tellus orci ac auctor
- Adipiscing elit ut aliquam purus sit amet viverra suspendisse potenti
- Mauris commodo quis imperdiet massa tincidunt nunc pulvinar
- Adipiscing elit ut aliquam purus sit amet viverra suspendisse potenti
What percentege of my income should go to savings?
Nisi quis eleifend quam adipiscing vitae aliquet bibendum enim facilisis gravida neque. Velit euismod in pellentesque massa placerat volutpat lacus laoreet non curabitur gravida odio aenean sed adipiscing diam donec adipiscing tristique risus. amet est placerat in egestas erat imperdiet sed euismod nisi.
“Nisi quis eleifend quam adipiscing vitae aliquet bibendum enim facilisis gravida neque velit euismod in pellentesque”
Do you have any comments? Share them with us on social media
Eget lorem dolor sed viverra ipsum nunc aliquet bibendum felis donec et odio pellentesque diam volutpat commodo sed egestas aliquam sem fringilla ut morbi tincidunt augue interdum velit euismod eu tincidunt tortor aliquam nulla facilisi aenean sed adipiscing diam donec adipiscing ut lectus arcu bibendum at varius vel pharetra nibh venenatis cras sed felis eget.
Hardwired GPS installation is the right choice for powered, high-value assets that need permanent, tamper-resistant tracking, while battery or solar trackers suit unpowered trailers and equipment. OBD-II devices work best for quick vehicle rollouts where speed matters more than concealment. Handle CAN-control work, large fleet deployments, or insurance-sensitive installs professionally; subscription-free devices with vendor-backed hardware and straightforward setup cover other needs.
TL;DR:
- Hardwired GPS trackers provide the most reliable, tamper-resistant tracking for powered assets but require careful wiring and professional installation.
- Battery and solar trackers are best suited for unpowered equipment, trailers, or assets sitting outdoors, with solar panels extending battery life indefinitely.
- Proper installation involves thorough documentation, correct wiring, secure mounting, and comprehensive testing to prevent future troubleshooting issues.
- DIY installation is feasible for small fleets or simple devices like OBD-II, but larger, complex, or insurance-sensitive setups benefit from professional installers.
- Subscription-free GPS devices with proven installation processes offer cost-effective, long-term fleet tracking without recurring monthly fees.
Table of Contents
- Which Equipment GPS Installation Method Fits Your Assets?
- What Do You Need To Prepare Before Installing a GPS Tracker?
- How Do You Install a Hardwired GPS Tracker?
- How Do You Install an OBD-II or Plug-and-Play GPS Tracker?
- How Do You Install Battery-Powered and Solar GPS Trackers?
- Where Should You Place the Antenna for the Best Signal?
- What Should You Test After Installing a GPS Tracker?
- Should You Install GPS Trackers Yourself or Hire a Professional?
- How Do You Troubleshoot Common GPS Tracker Faults?
- Why Installation Quality Determines Your Tracking ROI
- Get Subscription-Free GPS Tracking Built for Reliable Installs
- Sources
- FAQ
Which Equipment GPS Installation Method Fits Your Assets?
Four installation types cover almost every use case a fleet manager faces, and picking the wrong one is the fastest way to end up with gaps in your tracking data.
- Hardwired trackers tap into a vehicle’s constant power and ignition circuits. They’re the most reliable option for company trucks, service vans, and powered equipment, but they take longer to install and require basic electrical know-how.
- OBD-II plug-and-play devices connect through the diagnostic port in seconds. Great for fast fleet rollouts, weak on concealment since anyone can unplug them.
- Battery-powered trackers run independently for months on internal cells. Ideal for trailers, generators, and equipment with no power source.
- Solar-assisted trackers extend battery life indefinitely with consistent sun exposure, best for equipment that sits outdoors, like construction machinery or shipping containers.
Decision cue: if the asset has a battery and you need it hidden, hardwire it. If it doesn’t, go battery or solar.
What Do You Need To Prepare Before Installing a GPS Tracker?
A rushed install almost always turns into a service call later. Before you touch a wire or a bracket, document and gather everything you’ll need.
- Record identifiers. Log the VIN or asset ID, the device’s IMEI or serial number, and the SIM card ID if applicable.
- Photograph the vehicle or equipment before installation, including the dashboard, engine bay, and mounting location.
- Gather your tools: a multimeter, wire crimpers, fuse taps, ring terminals, zip ties, and heat shrink tubing.
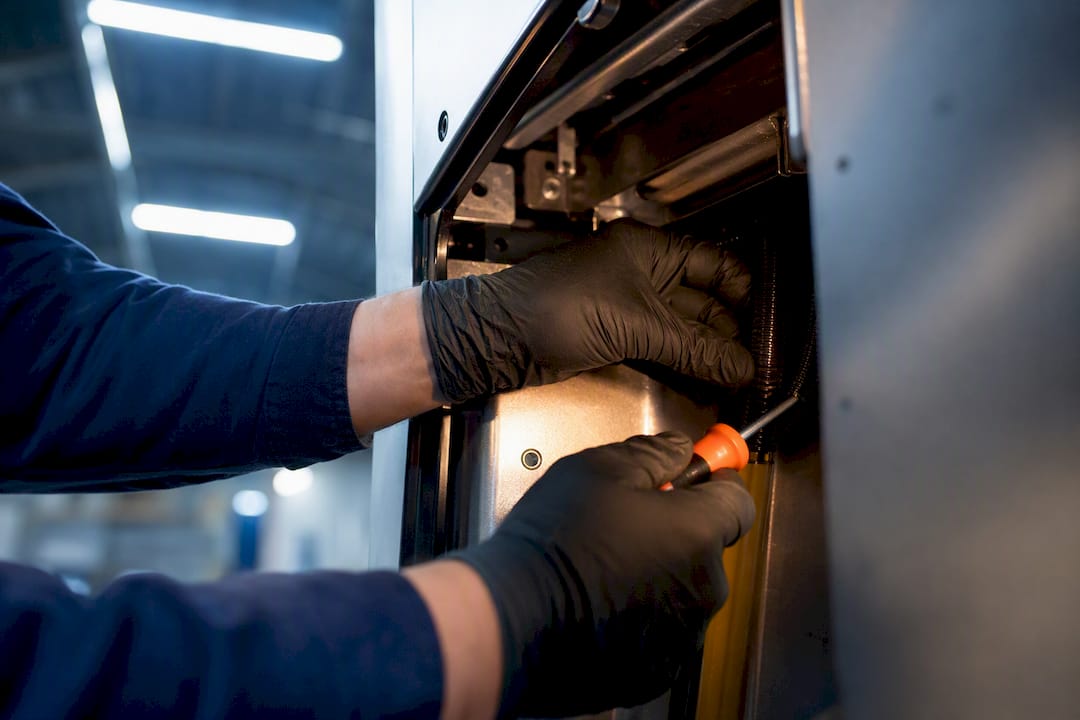
- Disconnect the battery on vehicles with sensitive electronics, and stay clear of airbag harnesses entirely.
- Check the warranty status of the vehicle or equipment; some manufacturers flag aftermarket wiring during warranty claims.
Documenting each install with photos, an IMEI number, and test results creates an audit trail that speeds up troubleshooting later, according to device installation best practices for GPS deployment.
Pro Tip: Keep a standardized install form for every vehicle. Fleets that use per-model install guides and a required checklist report fewer recurring faults and cheaper troubleshooting over time.
How Do You Install a Hardwired GPS Tracker?
Hardwired installs deliver the most reliable, lowest-maintenance tracking available, but only if the wiring is done right the first time.
- Pick your mounting spot by balancing concealment with two practical needs: a clear view of the sky for the GPS antenna, and access for future service.
- Connect fused constant power rather than tapping an unfused circuit, then run a short, direct chassis ground using a ring terminal on scraped, bare metal.
- Wire ignition sense to a switched accessory circuit so the device knows when the vehicle is running.
- Route the harness along factory wire bundles, securing it every 6 to 8 inches, with a service loop at both ends to prevent chafing.
- Keep antenna cables separate from power wiring to reduce interference.
Best-practice wiring, including fused constant power and a clean, scraped chassis ground, is what separates a tracker that reports reliably for years from one that resets randomly, according to asset tracker installation guidance. If the device controls CAN functions like immobilization, bench-validate the CAN program for that exact make and year before it ever goes into a live vehicle.
Pro Tip: A weak ground is the most common invisible cause of intermittent resets. If a device drops offline randomly after a hardwired install, check the ground connection first.
How Do You Install an OBD-II or Plug-and-Play GPS Tracker?
OBD-II installs take minutes, not hours, which makes them the fastest way to get an entire fleet reporting.
- Locate the OBD-II port, usually under the dash near the steering column, and seat the connector fully without forcing or bending pins.
- Secure the cable with a zip tie so it doesn’t dangle near the pedals or driver’s feet.
- Test the GPS fix immediately after plugging in to confirm the device is communicating before you drive off.
- Watch for signal blocking from metal dashboard components; an external antenna extension solves this on affected models.
The convenience comes with trade-offs. OBD-II installs are prone to tampering since anyone can unplug the device, and mixed fleets that combine OBD and hardwired units need a clear policy on device swapping, because a driver who moves an OBD tracker between vehicles creates misattributed mileage and confusing data gaps.
How Do You Install Battery-Powered and Solar GPS Trackers?
Unpowered equipment, trailers, and generators need a tracker that doesn’t depend on a running engine.
- Mount magnetically for quick, temporary placement, or bolt/adhesive-mount for a permanent, tamper-resistant setup on heavy equipment.
- Position for both signal and concealment, keeping the antenna side facing open sky when possible.
- Balance reporting frequency against battery life; more frequent location pings drain the battery faster, so match the interval to how often you actually need updates.
- Add solar panels on equipment that sits outdoors consistently, which can extend runtime indefinitely, given normal sun exposure.
For equipment exposed to weather, match tracker type to the environment. Hardwired units suit powered high-value assets, while battery or solar trackers fit trailers and unpowered gear, according to equipment tracking installation guidance. An IP67-rated enclosure with a mechanical mount, not just an adhesive pad, holds up far better against dust and water on job-site equipment.
Where Should You Place the Antenna for the Best Signal?
GPS satellite signals arrive at roughly -136 dBm, an extremely weak signal that even minor obstructions can disrupt. Metal roofs, heated windshields, and nearby inverters all degrade reception, so the antenna needs a clear, unobstructed view of the sky whenever possible.
Keep GPS and cellular antennas physically separated to avoid cross-interference, and never let cable runs get crushed or kinked behind panels; that alone can knock out reception even with a perfect mounting spot. For cellular antennas, maintain a solid ground plane near the mount point.
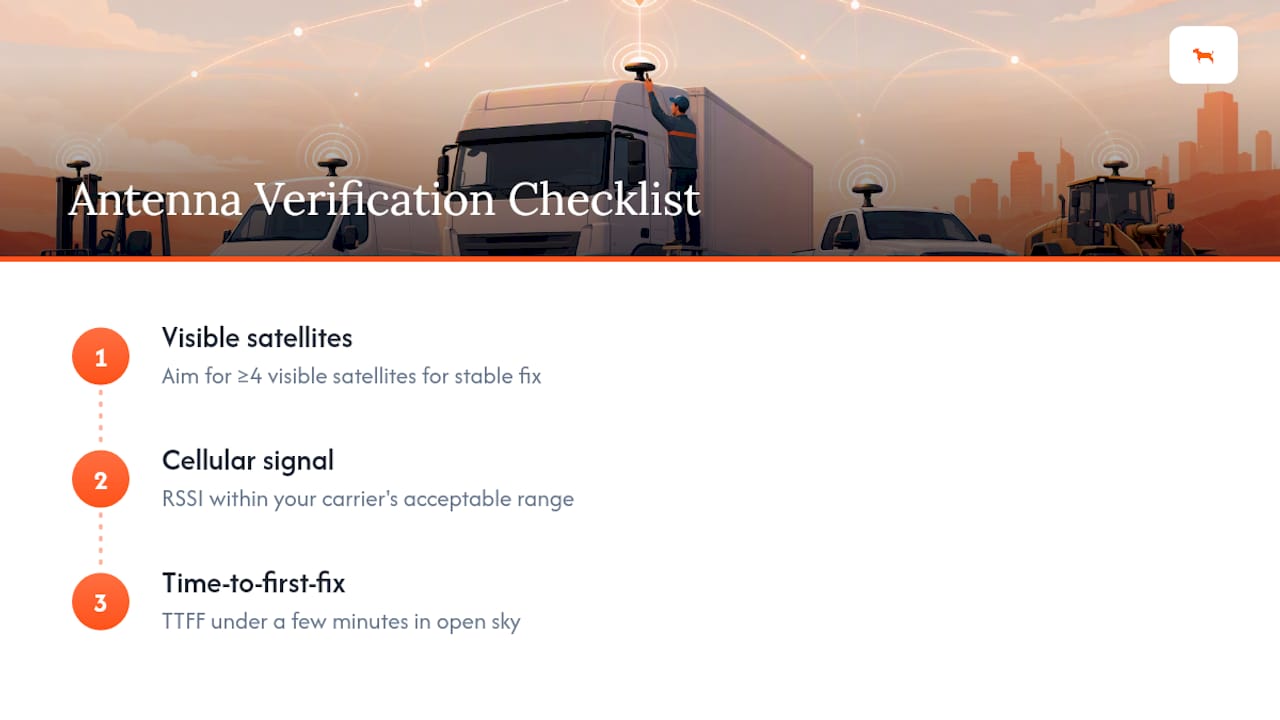
What to verify: aim for a minimum of four visible satellites for a stable fix, cellular signal strength (RSSI) in an acceptable range for your carrier, and a time-to-first-fix under a few minutes in open sky conditions.
What Should You Test After Installing a GPS Tracker?
No install is finished until it passes a full functional test. Skipping this step is how “working” trackers end up silent three weeks later.
- Confirm power and GPS fix. The device should power on and acquire a GPS fix within 10 minutes.
- Verify cellular connection. Check that the device links to the network and shows online status on the server or app.
- Test ignition detection by starting and stopping the vehicle, confirming trip events log correctly.
- Trigger a geofence or harsh-event alert to confirm notifications reach the right person.
- Check CAN parameters, if applicable, for control-capable devices.
- Document the results with a photo, the IMEI, tester name, and date.
| Test | Target Result |
|---|---|
| GPS fix time | Under 10 minutes |
| Cellular link | Device shows online on server |
| Ignition detection | Trip logs start/stop correctly |
| Geofence alert | Notification received |
| Battery protection | Warning near 12V, cutoff near 11.5V |
A large share of “tracker doesn’t work” support tickets trace back to installation faults, poor grounds, blocked antennas, wrong fuses, or devices that were never tested before sign-off, according to GPS tracker deployment guidance. A five-minute checklist at the end of the install prevents most of them.
Should You Install GPS Trackers Yourself or Hire a Professional?
The right answer depends on scale and complexity, not just upfront cost.
DIY installs cost less initially, mainly your time and basic tools, and work fine for a handful of vehicles using OBD-II or straightforward hardwired setups. Professional installs typically cost more per unit, with price driven by wiring complexity, whether CAN programming is involved, and how many vehicles need service in one visit.
- Choose professional installation for CAN-control devices requiring per-vehicle programming, fleets of 20 or more units, insurance or compliance-sensitive tracking, and covert hardwired mounts that need to survive inspection.
- DIY is reasonable for small fleets, OBD-II rollouts, and battery-powered trackers on trailers or equipment.
Large self-install projects often produce substantial rework when many units get misinstalled, which is why enterprise fleets frequently choose professional installers to lower lifetime costs even though the sticker price is higher upfront. A well-documented, managed fleet of trackers also makes future audits and swaps far less painful.
How Do You Troubleshoot Common GPS Tracker Faults?
Most tracker failures trace back to one of three culprits: power, ground, or antenna.
- Check power first with a multimeter at the device connector; no voltage means a blown fuse or bad connection.
- Inspect the ground next; a loose or corroded ground causes intermittent resets more often than any other single fault.
- Reposition the antenna if GPS fix times are slow or inconsistent, checking for new obstructions like added cargo or equipment.
- Bench-test the device if the vehicle-side checks pass but the device still won’t report, and escalate to a professional installer if the issue persists.
Set a maintenance cadence: audit installs quarterly, check firmware updates twice a year, and monitor battery health on solar and battery-powered units each season.
Pro Tip: Keep a spare fuse tap and multimeter in every service vehicle. Most field fixes take under 10 minutes once you know where to look.
Why Installation Quality Determines Your Tracking ROI
A tracker that reports intermittently is worse than no tracker at all, because it creates false confidence in data that’s actually full of holes. Fleet managers who standardize their install process, consistent grounding, fused power, documented tests, see dramatically fewer support calls and far more trustworthy mileage and location records over the life of the device.
This is where hardware choice matters. Subscription-free 4G trackers are built for reliability-first deployment, with customizable geofencing, long battery life, and detailed mileage reporting trusted by many businesses. A tracker that’s easy to install correctly the first time is the one that actually stays installed correctly.
Get Subscription-Free GPS Tracking Built for Reliable Installs
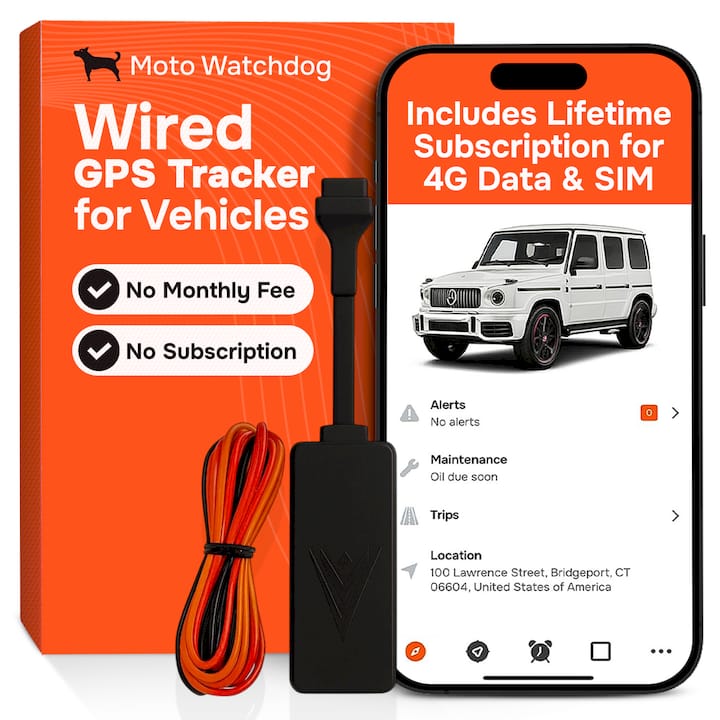
Most GPS tracking services lock you into a monthly subscription just to keep the device reporting. Some providers skip monthly subscription fees entirely: you pay once for the hardware and keep tracking without a recurring bill eating into your fleet budget every month.
The devices are built for the exact installation scenarios covered in this guide, hardwired units with fused power and long-term reliability, plus battery and solar options for trailers and unpowered equipment. Whether you’re outfitting a single service van or a full contractor fleet, the product lineup covers powered and unpowered assets with the same simple setup process. Fleet-specific buyers can check the contractor and fleet tracking page for devices matched to commercial vehicle use, and tracking your install may even support insurance discount programs depending on your provider. Ready to get a device installed the right way? Browse the current lineup and pick the tracker that matches your equipment before your next job goes out the door.
Sources
- Device Installation Best Practices: GPS Tracker Deployment Guide
- Switchboard Asset Tracker installation guide
- How to Install a GPS Tracker on Equipment
FAQ
How Much Does It Cost To Install a GPS Tracker?
Costs vary by method and scale: OBD-II plug-in devices cost the least since there’s no wiring involved, while hardwired professional installs run higher due to labor and any required CAN programming. Enterprise fleets often pay more per unit upfront for professional installation but see lower lifetime costs from fewer misinstalled devices.
What Is the Best GPS Tracker for Heavy Equipment?
For powered, high-value equipment, a hardwired tracker offers the most reliable, tamper-resistant tracking. For unpowered equipment like trailers or generators, a battery or solar-powered tracker with an IP67 or higher rating holds up best against dust and weather exposure.
How Do I Install a GPS Tracker Myself?
For OBD-II devices, locate the diagnostic port, plug the tracker in, and verify a GPS fix within a few minutes. For hardwired installs, connect fused constant power, run a clean chassis ground with a ring terminal, wire ignition sense to a switched circuit, and test power, GPS fix, and cellular connection before finishing the job.
Do I Need a Professional To Install a GPS Tracker?
Not always. Small fleets using OBD-II or straightforward hardwired setups can typically install trackers themselves, but CAN-control devices, large fleet rollouts, and insurance-sensitive installs generally call for professional installation to avoid costly rework.