How to start saving money
Lorem ipsum dolor sit amet, consectetur adipiscing elit lobortis arcu enim urna adipiscing praesent velit viverra sit semper lorem eu cursus vel hendrerit elementum morbi curabitur etiam nibh justo, lorem aliquet donec sed sit mi dignissim at ante massa mattis.
- Neque sodales ut etiam sit amet nisl purus non tellus orci ac auctor
- Adipiscing elit ut aliquam purus sit amet viverra suspendisse potent
- Mauris commodo quis imperdiet massa tincidunt nunc pulvinar
- Excepteur sint occaecat cupidatat non proident sunt in culpa qui officia
Why it is important to start saving
Vitae congue eu consequat ac felis placerat vestibulum lectus mauris ultrices cursus sit amet dictum sit amet justo donec enim diam porttitor lacus luctus accumsan tortor posuere praesent tristique magna sit amet purus gravida quis blandit turpis.

How much money should I save?
At risus viverra adipiscing at in tellus integer feugiat nisl pretium fusce id velit ut tortor sagittis orci a scelerisque purus semper eget at lectus urna duis convallis. porta nibh venenatis cras sed felis eget neque laoreet suspendisse interdum consectetur libero id faucibus nisl donec pretium vulputate sapien nec sagittis aliquam nunc lobortis mattis aliquam faucibus purus in.
- Neque sodales ut etiam sit amet nisl purus non tellus orci ac auctor
- Adipiscing elit ut aliquam purus sit amet viverra suspendisse potenti
- Mauris commodo quis imperdiet massa tincidunt nunc pulvinar
- Adipiscing elit ut aliquam purus sit amet viverra suspendisse potenti
What percentege of my income should go to savings?
Nisi quis eleifend quam adipiscing vitae aliquet bibendum enim facilisis gravida neque. Velit euismod in pellentesque massa placerat volutpat lacus laoreet non curabitur gravida odio aenean sed adipiscing diam donec adipiscing tristique risus. amet est placerat in egestas erat imperdiet sed euismod nisi.
“Nisi quis eleifend quam adipiscing vitae aliquet bibendum enim facilisis gravida neque velit euismod in pellentesque”
Do you have any comments? Share them with us on social media
Eget lorem dolor sed viverra ipsum nunc aliquet bibendum felis donec et odio pellentesque diam volutpat commodo sed egestas aliquam sem fringilla ut morbi tincidunt augue interdum velit euismod eu tincidunt tortor aliquam nulla facilisi aenean sed adipiscing diam donec adipiscing ut lectus arcu bibendum at varius vel pharetra nibh venenatis cras sed felis eget.
Start with a baseline utilization audit and tie your preventive maintenance (PM) schedule directly to telematics-reported engine hours. That single combination is the highest-leverage move in construction equipment monitoring best practices, because it converts two guesses — “Is this machine busy enough?” and “Does it need service yet?” — into data-driven decisions. Disciplined equipment management can reduce equipment costs and improve schedule reliability across multi-site fleets.
Three actions you can take in the next 24–72 hours:
- Pull current engine-hour reports for every tracked asset and calculate utilization % (productive hours ÷ available hours × 100).
- Map each machine to its manufacturer PM intervals (250/500/1,000/2,000 hours) and flag any that are overdue.
- Assign a named technician as PM owner for each asset class so accountability is clear before you add any new technology.
Pro Tip: The most common pitfall is treating maintenance as a reactive support function — fixing what breaks rather than scheduling what wears. Reactive maintenance costs more per hour and creates the unplanned downtime that cascades into schedule delays. Build PM triggers into your telematics platform before your first device goes live.
Key Takeaways
Disciplined construction equipment monitoring, anchored by a baseline utilization audit and hour-based PM schedules tied to telematics data, is the single most effective path to reducing equipment costs and improving schedule reliability on North American multi-site fleets.
| Point | Details |
|---|---|
| Baseline before deploying tech | Capture utilization %, idle hours, MTTR, and maintenance cost per hour before commissioning any device. |
| Use three PM triggers | Combine hour-based (250/500/1,000/2,000-hr intervals), condition-based (fault codes), and calendar-based triggers for full coverage. |
| Pilot 3–5 assets first | A 30-day pilot produces the alert-tuning data and ROI proof needed to justify full fleet deployment. |
| Track utilization against 70% | Review assets falling below roughly 70% utilization for reassignment or release to cut holding costs. |
| Motowatchdog for fast pilots | Subscription-free GPS devices with geofencing, idle tracking, and a mobile app support rapid multi-site rollout without monthly fees. |
Table of Contents
- What are the core best practices for monitoring construction equipment?
- What features should you require from a monitoring system?
- How do you roll out monitoring across multiple sites without disruption?
- How do you move from preventive to predictive maintenance?
- A real-world tracking setup checklist for a mixed fleet
- How do you prevent equipment theft with monitoring systems?
- What KPIs should you track and how do you calculate ROI?
- How do you choose the right monitoring system for your fleet?
- Training program content for operators and management
- Change management strategies for construction workforce adoption
- Regulatory compliance for equipment monitoring in North America
- Why equipment monitoring must be a core project discipline
- Motowatchdog makes rapid GPS deployment practical for mixed fleets
- Sources
What are the core best practices for monitoring construction equipment?
Strong construction equipment management starts with standardized field routines that make the fleet predictable and auditable across every site.
Daily pre-start inspections
Operators should complete a structured pre-start check before every shift. The checklist covers fluid levels (engine oil, coolant, hydraulic fluid, fuel), tire or track condition, lights and safety devices, visible structural damage, and any active fault codes on the display. Signed daily logs convert this routine from paperwork into practiced discipline and improve PM completion rates by catching issues before they become failures.
Preventive maintenance discipline
Hour-based PM intervals are the backbone of any reliable PM program. Standard heavy-equipment intervals look like this:
| Interval | Typical Tasks |
|---|---|
| 250 hours | Engine oil and filter, fuel filter, visual inspection of belts and hoses |
| 500 hours | Hydraulic filter, air filter, greasing of all pivot points |
| 1,000 hours | Coolant flush, transmission fluid, drive belt replacement |
| 2,000 hours | Major overhaul checks, injector inspection, undercarriage measurement |
Target a high PM compliance rate, with lower rates signaling that your scheduling system or technician capacity needs attention.
Asset identification and tagging
Every asset needs a unique ID — a QR code or barcode tag affixed to the cab and the machine frame, linked to a master record in your asset management system. Scanning a QR tag to open an asset profile reduces mystery failures and speeds field response because any crew member can pull up the service history and open a fault report from a phone in under 30 seconds.
Baseline metrics before tech deployment
Before deploying any monitoring technology, capture these numbers manually or from existing records:
- Current utilization % per asset class
- Average idle hours per shift
- Mean time to repair (MTTR) for the last 12 months
- Maintenance cost per engine hour
- Number of unplanned breakdowns in the last quarter
These baselines are your ROI proof points. Without them, you cannot demonstrate the value of the monitoring investment to ownership or project management.
Pro Tip: Run a 30-day manual baseline period before commissioning telematics devices. The contrast between manual estimates and actual sensor data almost always reveals idle-time and utilization surprises that justify the investment immediately.
What features should you require from a monitoring system?
Not every telematics platform delivers the data quality or integration depth that multi-site fleet management demands. Here is the minimum dataset and capability set worth specifying in any procurement.

Essential data streams
A capable monitoring system must provide real-time and historical access to:
- GPS location with configurable update frequency (at minimum every 60 seconds when the machine is active)
- Engine hours logged continuously, not estimated from calendar time
- Idle time broken out from productive hours
- Fuel level and consumption per shift and per job
- Battery voltage to catch charging issues before a no-start event
- Fault codes (DTCs) from the machine’s CAN bus or OBD port
- Temperature for engines, hydraulic fluid, or ambient conditions where duty cycle demands it
Telematics and IoT sensors feed utilization dashboards, trigger PM work orders automatically, and expose idle-time and fuel-waste patterns that are invisible without instrumentation.
Operational features
Beyond raw data, the platform needs to support field operations:
- Geofencing with configurable zone boundaries per site and per shift window
- Tamper and movement alerts that fire within minutes of an unauthorized move
- Offline logging so devices continue recording when cellular coverage drops on remote sites
- Configurable alert thresholds (idle time over 20 minutes, fuel drop over 10% without engine run, etc.)
- CMMS and ERP integrations via API or native connector so work orders generate automatically
- API access for custom reporting and integration with project scheduling tools
For hardwiring versus battery-powered device selection, a GPS tracker fleet hardwiring guide covers the practical tradeoffs in detail. Battery-powered units work well for trailers and non-powered assets; hardwired units are preferable for heavy equipment where continuous power is available and data fidelity matters most.
Data quality and security
Sampling frequency matters. A device that pings every 5 minutes misses short idle events and gives inaccurate engine-hour counts. Specify a minimum 60-second active update rate and confirm the device stores locally when offline.
On the security side, require TLS encryption for all data in transit, role-based access control so operators see only their assigned assets, and a documented data retention policy. In North America, telematics data collected from employees may be subject to state-level privacy regulations (California’s CCPA, for example) and applicable labor agreements. Confirm your vendor’s data ownership terms in writing before signing.
How do you roll out monitoring across multiple sites without disruption?
A phased rollout protects operations while generating the proof points needed to justify full deployment. A short pilot with 3–5 representative assets produces the data needed to tune alerts and demonstrate ROI before committing to a full installation.
Phased timeline
- Days 1–30 (Pilot): Commission 3–5 assets across one or two representative sites. Define success metrics upfront: utilization lift target, PM compliance rate, and any theft incidents prevented. Complete device installation, baseline data capture, operator training, CMMS integration test, and initial alert tuning.
- Days 31–60 (Scale): Expand to a representative cross-section of the fleet. Integrate the CMMS fully so work orders generate from hour-based triggers. Begin parts prepositioning for the most common PM intervals. Refine alert thresholds based on pilot false-positive rates.
- Days 61–90 (Full Rollout): Deploy remaining assets. Conduct a formal KPI review against pilot baselines. Formalize governance: who owns alerts, who signs work orders, and what the SLA is for critical versus non-critical faults.
Pilot commissioning checklist
- Device physically installed and powered on
- Asset master record created with serial number, QR tag, and assigned technician
- Baseline engine hours and fuel level recorded at commissioning
- Geofence boundaries configured for the site
- CMMS integration tested with a manual work order trigger
- Operator briefed on pre-start check procedure and digital log submission
Escalation and governance
Define the alert-to-action chain before go-live. A critical fault code (engine overheat, hydraulic pressure loss) should reach the assigned technician and site supervisor within 15 minutes. Non-critical alerts (idle time threshold, low fuel) can route to a daily digest. Without a clear escalation path, alert fatigue sets in within weeks and the monitoring investment loses its value.
Pro Tip: Involve two or three experienced operators in the pilot selection process. Their buy-in during the pilot phase converts them into internal advocates during full rollout, which is worth more than any formal training session.
How do you move from preventive to predictive maintenance?
A CMMS centralizes maintenance schedules, automates work orders, tracks asset history, and is the operational hub that makes the shift from reactive to proactive maintenance possible. Without it, PM records live in spreadsheets or paper binders that no one checks until something breaks.
Three maintenance triggers combined
The most reliable programs combine three trigger types:
- Hour-based: PM fires automatically when the telematics system reports the asset has reached the next interval threshold.
- Condition-based: A fault code or sensor reading (elevated hydraulic temperature, voltage drop below threshold) opens a conditional work order immediately.
- Calendar-based: Seasonal needs — antifreeze checks before winter, cooling system flushes before summer — that do not align neatly with engine hours.
Combining all three, as recommended for heavy-equipment PM programs, gives the best balance of reliability and cost control across different climates and duty cycles.
Parts forecasting for remote sites
A structured parts forecasting model tied to PM schedules reduces emergency repair lead times significantly, especially for remote projects. Forecast parts demand 12 months forward based on your PM intervals and fleet size, then preposition kits at each site for the most common 250-hour and 500-hour services. A machine waiting three days for a filter on a remote site costs far more in downtime than the carrying cost of a small parts inventory.
Predictive maintenance and early detection
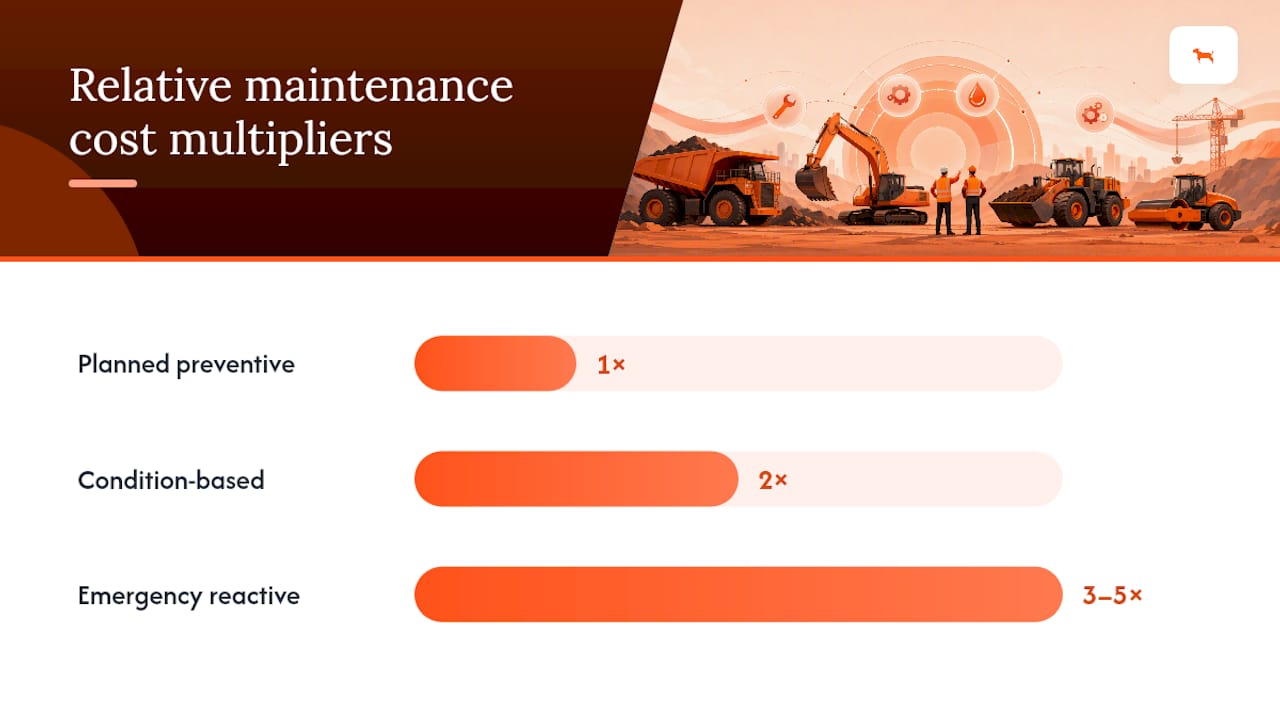
When telematics data feeds into trend analysis — rising idle fuel consumption, gradual voltage decline, increasing DTC frequency — you can schedule a repair before the failure occurs. The ROI case is straightforward: a planned repair during a scheduled downtime window costs a fraction of an emergency breakdown that halts production and requires expedited parts shipping.
| Maintenance Type | Trigger | Typical Cost Multiplier vs. Planned |
|---|---|---|
| Planned preventive | Hour or calendar interval | 1× |
| Condition-based | Sensor alert or fault code | 2× |
| Emergency reactive | Failure in the field | 3–5× |
Pro Tip: Assign one technician as the primary owner for each asset class, not each individual machine. Ownership by class builds deep familiarity with failure patterns and makes predictive alerts far more meaningful than a generic notification to a shared inbox.
A real-world tracking setup checklist for a mixed fleet
Here is a practical commissioning sequence you can adapt for a mixed fleet of excavators, wheel loaders, skid steers, and light towers.
Device selection rules
- Hardwired devices for all powered heavy equipment (excavators, dozers, loaders, graders). Continuous power means continuous data, no battery management overhead, and reliable CAN bus integration for fault codes. See the hardwired GPS tracker guide for installation specifics.
- Battery-powered devices for trailers, generators, light towers, and non-powered attachments. Expect 30–90 days of battery life depending on reporting frequency; set a lower update rate (every 5–10 minutes) to extend life.
- OBD-II plug-in devices for light vehicles and pickup trucks in the fleet where a hardwired install is not practical.
Tagging and commissioning steps
- Create the asset master record in your CMMS: make, model, year, serial number, current engine hours, and assigned technician.
- Affix a QR tag to the cab door and a secondary tag to the machine frame. Record both tag IDs in the master record.
- Install the GPS device and confirm it is transmitting location and engine hours.
- Record the commissioning baseline: GPS coordinates, engine hours, fuel level, and any active fault codes.
- Place a cab card in the operator station listing the asset ID, the assigned technician’s contact, and the pre-start checklist items.
- Configure geofence boundaries for the assigned site.
Integration touchpoints
- CMMS: receives engine-hour updates every 24 hours and auto-generates PM work orders at interval thresholds.
- ERP: receives utilization data for cost allocation to project codes.
- Project schedule: utilization reports feed into equipment availability forecasts for upcoming phases.
- GPS data integration examples show how these data flows work in practice for fleet managers.
Week-1 validation and month-1 review
Verify that at least one PM alert has fired correctly and routed to the right technician. At the 30-day mark, compare actual utilization % and idle hours against the pre-deployment baseline to confirm the data is clean and the alerts are calibrated.
Pro Tip: Mount battery-powered devices inside a locked compartment or under a panel rather than in plain sight. Visible devices are more likely to be tampered with or removed on shared sites.
How do you prevent equipment theft with monitoring systems?
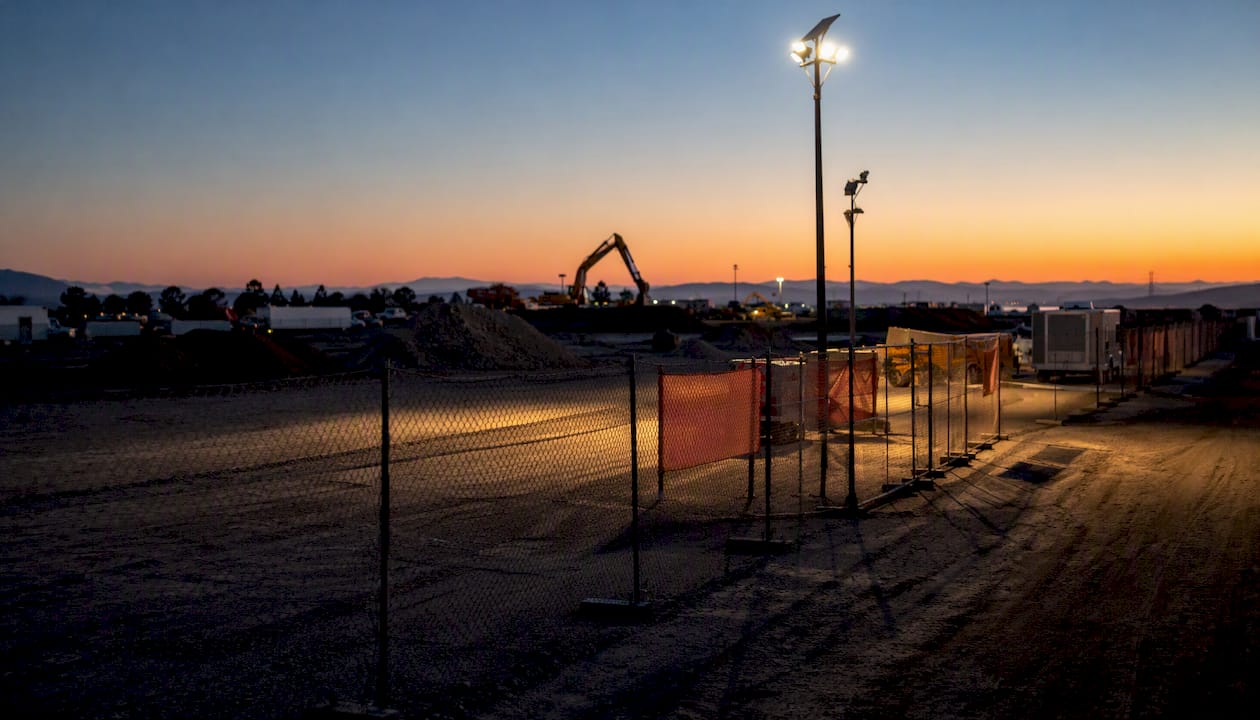
After-hours monitoring combined with a visible security presence is the highest-leverage investment for preventing equipment theft. Cameras alone rarely stop theft without an active response capability behind them.
Layered security approach
No single control prevents theft. The effective approach stacks multiple layers:
- Human presence: security personnel or a monitored guard service during overnight and weekend hours
- CCTV and remote video: cameras covering equipment staging areas, site entrances, and high-value asset parking zones, connected to a monitoring center that can respond in real time
- Perimeter controls: fencing, locked gates, and lighting that eliminates dark zones where equipment is parked
- Access control: key management logs, key lockboxes, and a sign-out procedure for every machine
Asset-level controls
- Remove keys from all machines at end of shift; store in a locked key cabinet with a sign-out log.
- Install kill switches or electronic immobilizers on high-value assets so a stolen machine cannot be driven off-site.
- Ensure every asset carries a unique GPS device and a visible asset ID tag that ties it to your records.
- Configure tamper alerts so any unauthorized movement triggers an immediate notification.
Geofence and after-hours alerting
Set geofence boundaries 50–100 feet inside the actual site perimeter so an alert fires before a machine reaches the fence line. Configure after-hours movement alerts for the hours between shift end and shift start. Tune the sensitivity during the first two weeks to eliminate false positives from legitimate overnight work before treating every alert as a theft attempt.
Incident response plan
- Alert fires: on-call supervisor receives push notification within 2 minutes.
- Supervisor reviews live GPS location and camera feed to confirm unauthorized movement.
- If confirmed: activate remote immobilizer if available, call law enforcement with GPS coordinates, and preserve telematics and video evidence for the report.
- Document the incident in the CMMS asset record with timestamps, GPS track, and video clip references.
Overnight and weekend checklist:
- All keys removed and secured
- Immobilizers activated on high-value assets
- Geofence alerts confirmed active for all GPS-equipped assets
- CCTV recording confirmed operational
- On-call supervisor contact posted at site entrance
What KPIs should you track and how do you calculate ROI?
Clear KPI definitions and a simple dashboard give you the numbers to justify monitoring investments to ownership and project management.
Core KPI definitions
- Utilization %: productive hours ÷ available hours × 100. Industry guidance recommends reviewing assets that fall below roughly 70% utilization for reassignment or release to avoid unnecessary holding costs.
- Idle hours: engine-on time with no productive output. High idle hours inflate fuel costs and accelerate wear without generating revenue.
- MTTR (mean time to repair): total repair time ÷ number of repair events. Tracks how quickly your team resolves faults.
- PM compliance rate: completed PMs ÷ scheduled PMs × 100. Target 95%+.
- Maintenance cost per hour: total maintenance spend ÷ total engine hours in the period.
- Theft incidents prevented: tracked via geofence alert responses that resulted in recovery or deterrence.
- Fuel burn per productive hour: total fuel consumed ÷ productive hours. Separates idle fuel waste from working consumption.
Simple ROI formulas
Maintenance savings: (Previous maintenance cost per hour − Current maintenance cost per hour) × Annual engine hours = Annual savings.
Rental reduction: If utilization monitoring allows you to return one rented machine 30 days early at $3,500/month, that is $3,500 recovered directly.
Theft-loss avoided: Average equipment theft loss per incident × incidents prevented = avoided loss. The National Equipment Register and law enforcement data consistently show construction equipment theft causes hundreds of millions of dollars in losses annually across North America.
Dashboard layout
A practical monitoring dashboard for a multi-site fleet includes three panels:
- Real-time alerts panel: active fault codes, geofence violations, and idle-time threshold breaches across all sites.
- Utilization heatmap: color-coded utilization % by asset and by site, updated daily.
- Maintenance trend report: PM compliance rate, MTTR trend, and maintenance cost per hour over a rolling 90-day window.
How do you choose the right monitoring system for your fleet?
A structured procurement process prevents you from buying on feature lists rather than operational fit.
Procurement workflow
- Document your requirements: asset count, asset types, site count, integration targets (CMMS, ERP), and must-have features (offline logging, CAN bus fault codes, geofencing).
- Run a pilot with 3–5 assets using the vendor’s standard hardware and software before signing a full contract.
- Negotiate SLAs for device replacement, data uptime, and support response time.
- Define acceptance criteria: data fidelity within 2% of physical hour meter, battery life meeting spec, alert delivery within 5 minutes of trigger.
- Set rollout triggers: full deployment proceeds only after pilot acceptance criteria are met.
Vendor question checklist
- Who owns the data, and can you export it in full at any time?
- What is the API documentation and rate limit?
- What is the minimum update frequency, and does it change in low-power mode?
- How does the device log data when cellular coverage is unavailable?
- What is the warranty period and the replacement process for failed devices?
- What is the typical installation time per asset, and do you provide certified installers?
- Is hardwiring supported for heavy equipment, and what connectors are used?
Evaluation criteria
Total cost of ownership matters more than device price. Factor in installation labor, CMMS integration development, ongoing support costs, and the cost of replacing devices that fail in harsh conditions. For budget-conscious pilots, a small fleet tracking guide covers low-cost device options and pilot configurations in detail.
Training program content for operators and management
A monitoring system is only as good as the people using it. Training needs to address two distinct audiences with different needs.
Operator training covers the pre-start inspection checklist and how to submit a digital fault report from the field, how to read the cab card and understand the asset ID system, what a geofence alert means and what operators should do if one fires during their shift, and basic telematics awareness so operators understand that idle time and fuel consumption are being tracked.
Supervisor and management training covers dashboard navigation and how to read utilization heatmaps, how to interpret PM compliance reports and escalate overdue work orders, how to respond to theft alerts using the incident response plan, and how to use KPI trend data in weekly project meetings.
Training sessions should be short (30–45 minutes), role-specific, and reinforced with a one-page reference card posted in every cab and in the site office. Refresher sessions at the start of each new project phase keep the routines current as crew composition changes.
Change management strategies for construction workforce adoption
Technology adoption in construction fails most often not because the technology is wrong, but because the change process ignores how field crews actually work.
The most effective approach starts with visible leadership commitment. When a project manager or superintendent uses monitoring data in a weekly toolbox talk — “Our excavator ran 4.2 idle hours yesterday, and here is what that costs per shift” — it signals that the data matters and that the monitoring program is not going away.
Supervisor scorecards are a practical accountability tool. Track PM compliance rate and pre-start check completion rate by crew or by supervisor, and share the results openly. Crews respond to peer comparison more reliably than to top-down mandates.
Incentives do not need to be large. Conversely, skipping pre-start checks or bypassing digital log submissions should carry a clear consequence, documented in the site safety plan.
Resistance is most common among experienced operators who have managed equipment without digital tools for years. Address it directly: explain that the data protects them as much as it holds them accountable. A telematics record showing a machine was already running rough before an operator’s shift is evidence in their favor if a breakdown dispute arises.
Regulatory compliance for equipment monitoring in North America
Equipment monitoring programs in North America operate within a patchwork of federal, state, and provincial regulations. Understanding the relevant frameworks protects your organization from liability and ensures your data practices hold up under audit.
OSHA and equipment safety: OSHA’s construction standards (29 CFR Part 1926) require that equipment be inspected before use and that defects affecting safety be corrected before operation. Digital pre-start inspection logs satisfy this requirement and create an auditable record. Ensure your monitoring platform stores inspection records for at least the retention period required by your applicable OSHA standard or state equivalent.
Data privacy: Telematics data collected from employee-operated equipment may constitute personal data under California’s CCPA or Canada’s PIPEDA if your operations extend into those jurisdictions. Key obligations include notifying employees that location and usage data is being collected, limiting data use to the stated business purpose, and honoring data access or deletion requests where applicable. Review your vendor’s data processing agreement against these requirements before deployment.
Labor agreements: Some collective bargaining agreements in the construction trades address electronic monitoring of workers. If your workforce is unionized, review the applicable CBA before deploying telematics on operator-controlled equipment. Engaging the union early in the pilot phase avoids grievances and often produces a more cooperative rollout.
Equipment registration and titling: GPS devices do not change equipment registration requirements, but accurate asset records (serial numbers, VINs, and equipment IDs) tied to your monitoring system support insurance claims and law enforcement recovery efforts in the event of theft.
Why equipment monitoring must be a core project discipline
Most construction organizations treat equipment monitoring as a maintenance department concern. That framing is the root cause of most monitoring failures.
When monitoring lives in the maintenance department, utilization data never reaches the project manager who is deciding whether to rent a second excavator. Theft alerts go to a technician who has no authority to call law enforcement. PM compliance reports sit in a CMMS that the project team never opens. The data exists, but it does not drive decisions.
The organizations that get the most value from monitoring treat it the same way they treat schedule and cost data: as a project-level KPI that every stakeholder reviews weekly. Shifting from run-to-failure to scheduled preventive maintenance is not just a maintenance decision. It is a project risk decision, because an unplanned equipment failure on a critical-path activity is a schedule event, not just a repair event.
The evidence supports this framing. That is a project-level financial outcome, not a back-office metric. Fleet managers who present monitoring KPIs alongside schedule and cost in project reviews get faster decisions, more budget support, and better crew compliance than those who report upward only when something breaks.
Motowatchdog makes rapid GPS deployment practical for mixed fleets
For fleet managers who need fast visibility without a long procurement cycle or monthly subscription fees, Motowatchdog offers a direct path to multi-site GPS tracking. The subscription-free model means you pay once for the hardware and use the companion app at no ongoing cost — a meaningful difference when you are running a pilot on 5–10 assets and need to demonstrate ROI before committing to a larger program.
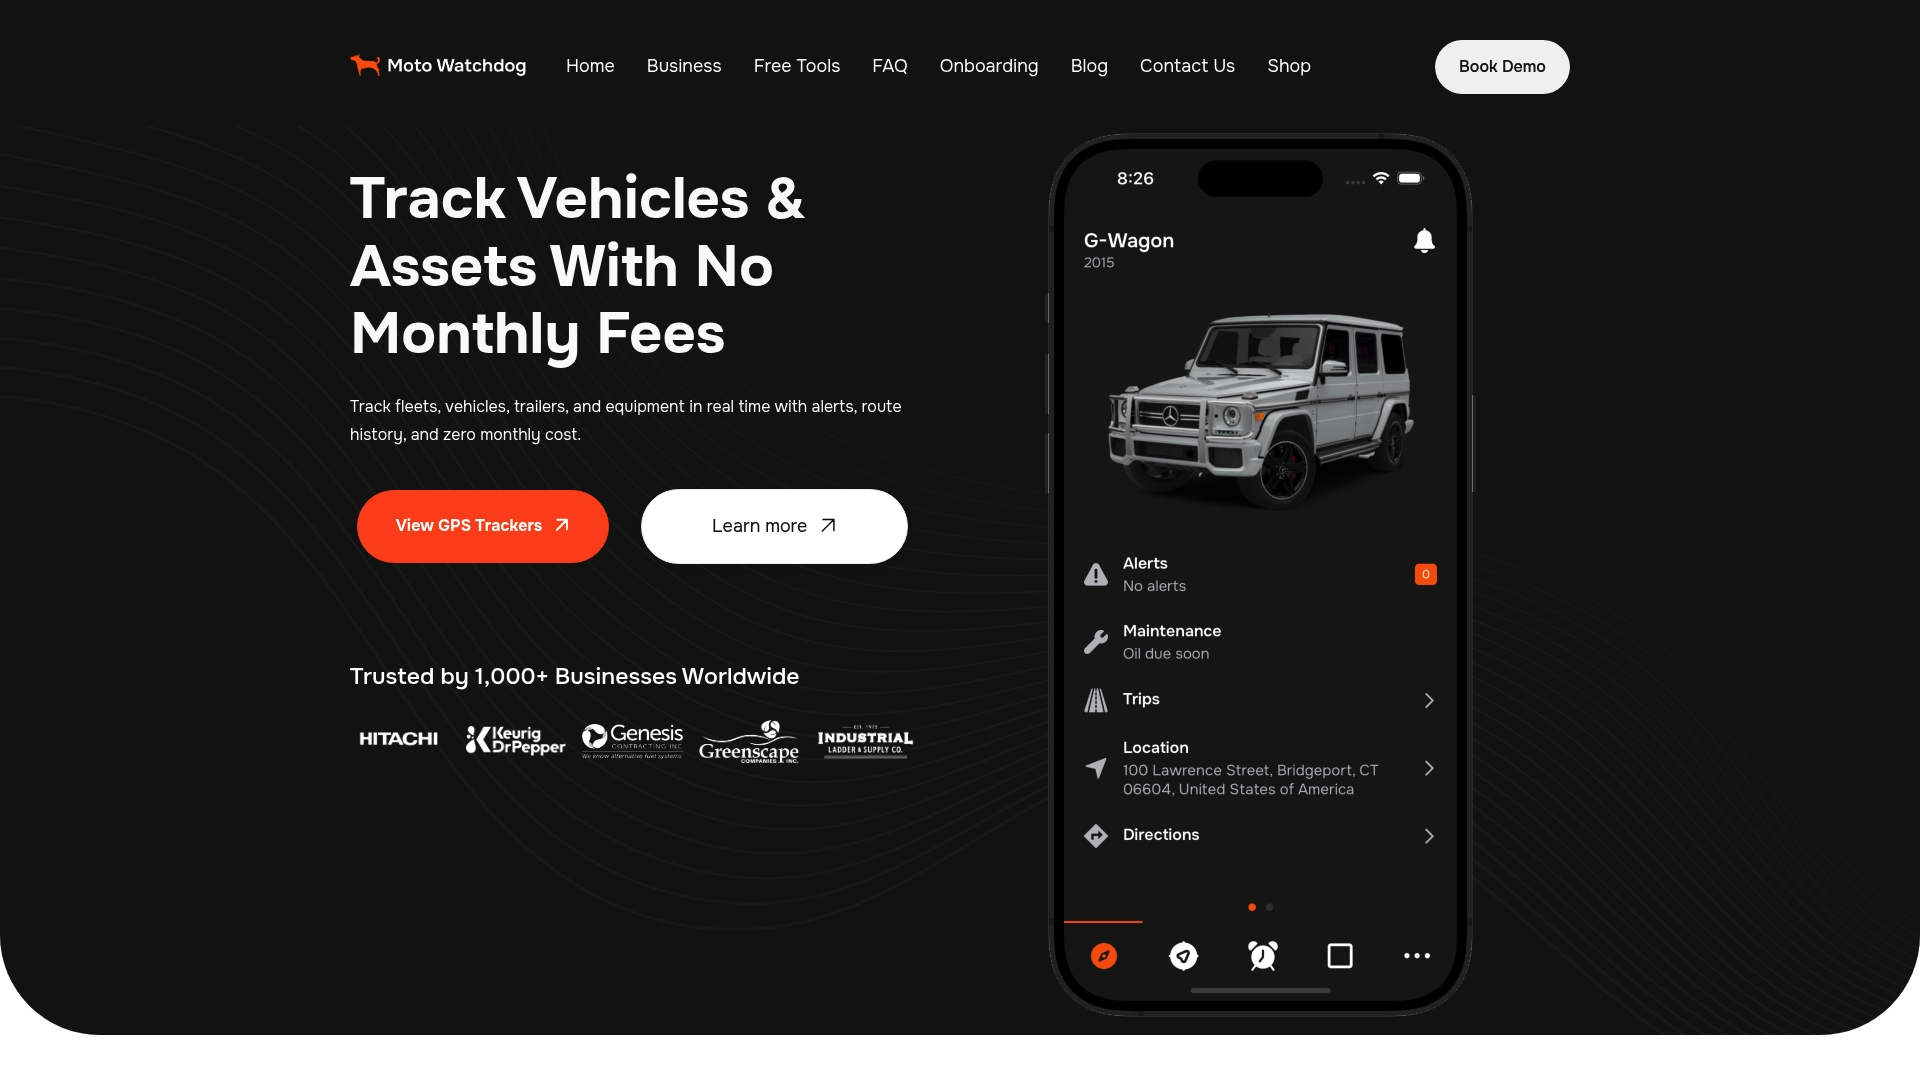
Motowatchdog devices support real-time location tracking, customizable geofencing alerts, idle time tracking, long battery life for non-powered assets, and push notifications for after-hours movement. The mobile app lets you manage multiple devices across sites from a single dashboard, which fits the multi-site fleet monitoring use case this guide is built around. For managers who want to move from a manual baseline audit to live GPS data in days rather than weeks, Motowatchdog is a practical starting point.
Visit Motowatchdog’s product page to review device specifications and get started with your pilot deployment.
Sources
The following sources informed this guide and are worth bookmarking for deeper reference:
- A Smart Approach to Repair and Maintenance | Construction Equipment
- Construction Equipment Management: Strategic Planning, Maintenance & Cost Optimization for 2026 | Re·Plan Construction
- The cost of construction site theft | Pro-Vigil